Workspace Members
Workspace Members allows the workspace Owner to invite team members and assign them roles, giving them scoped access to the workspace.
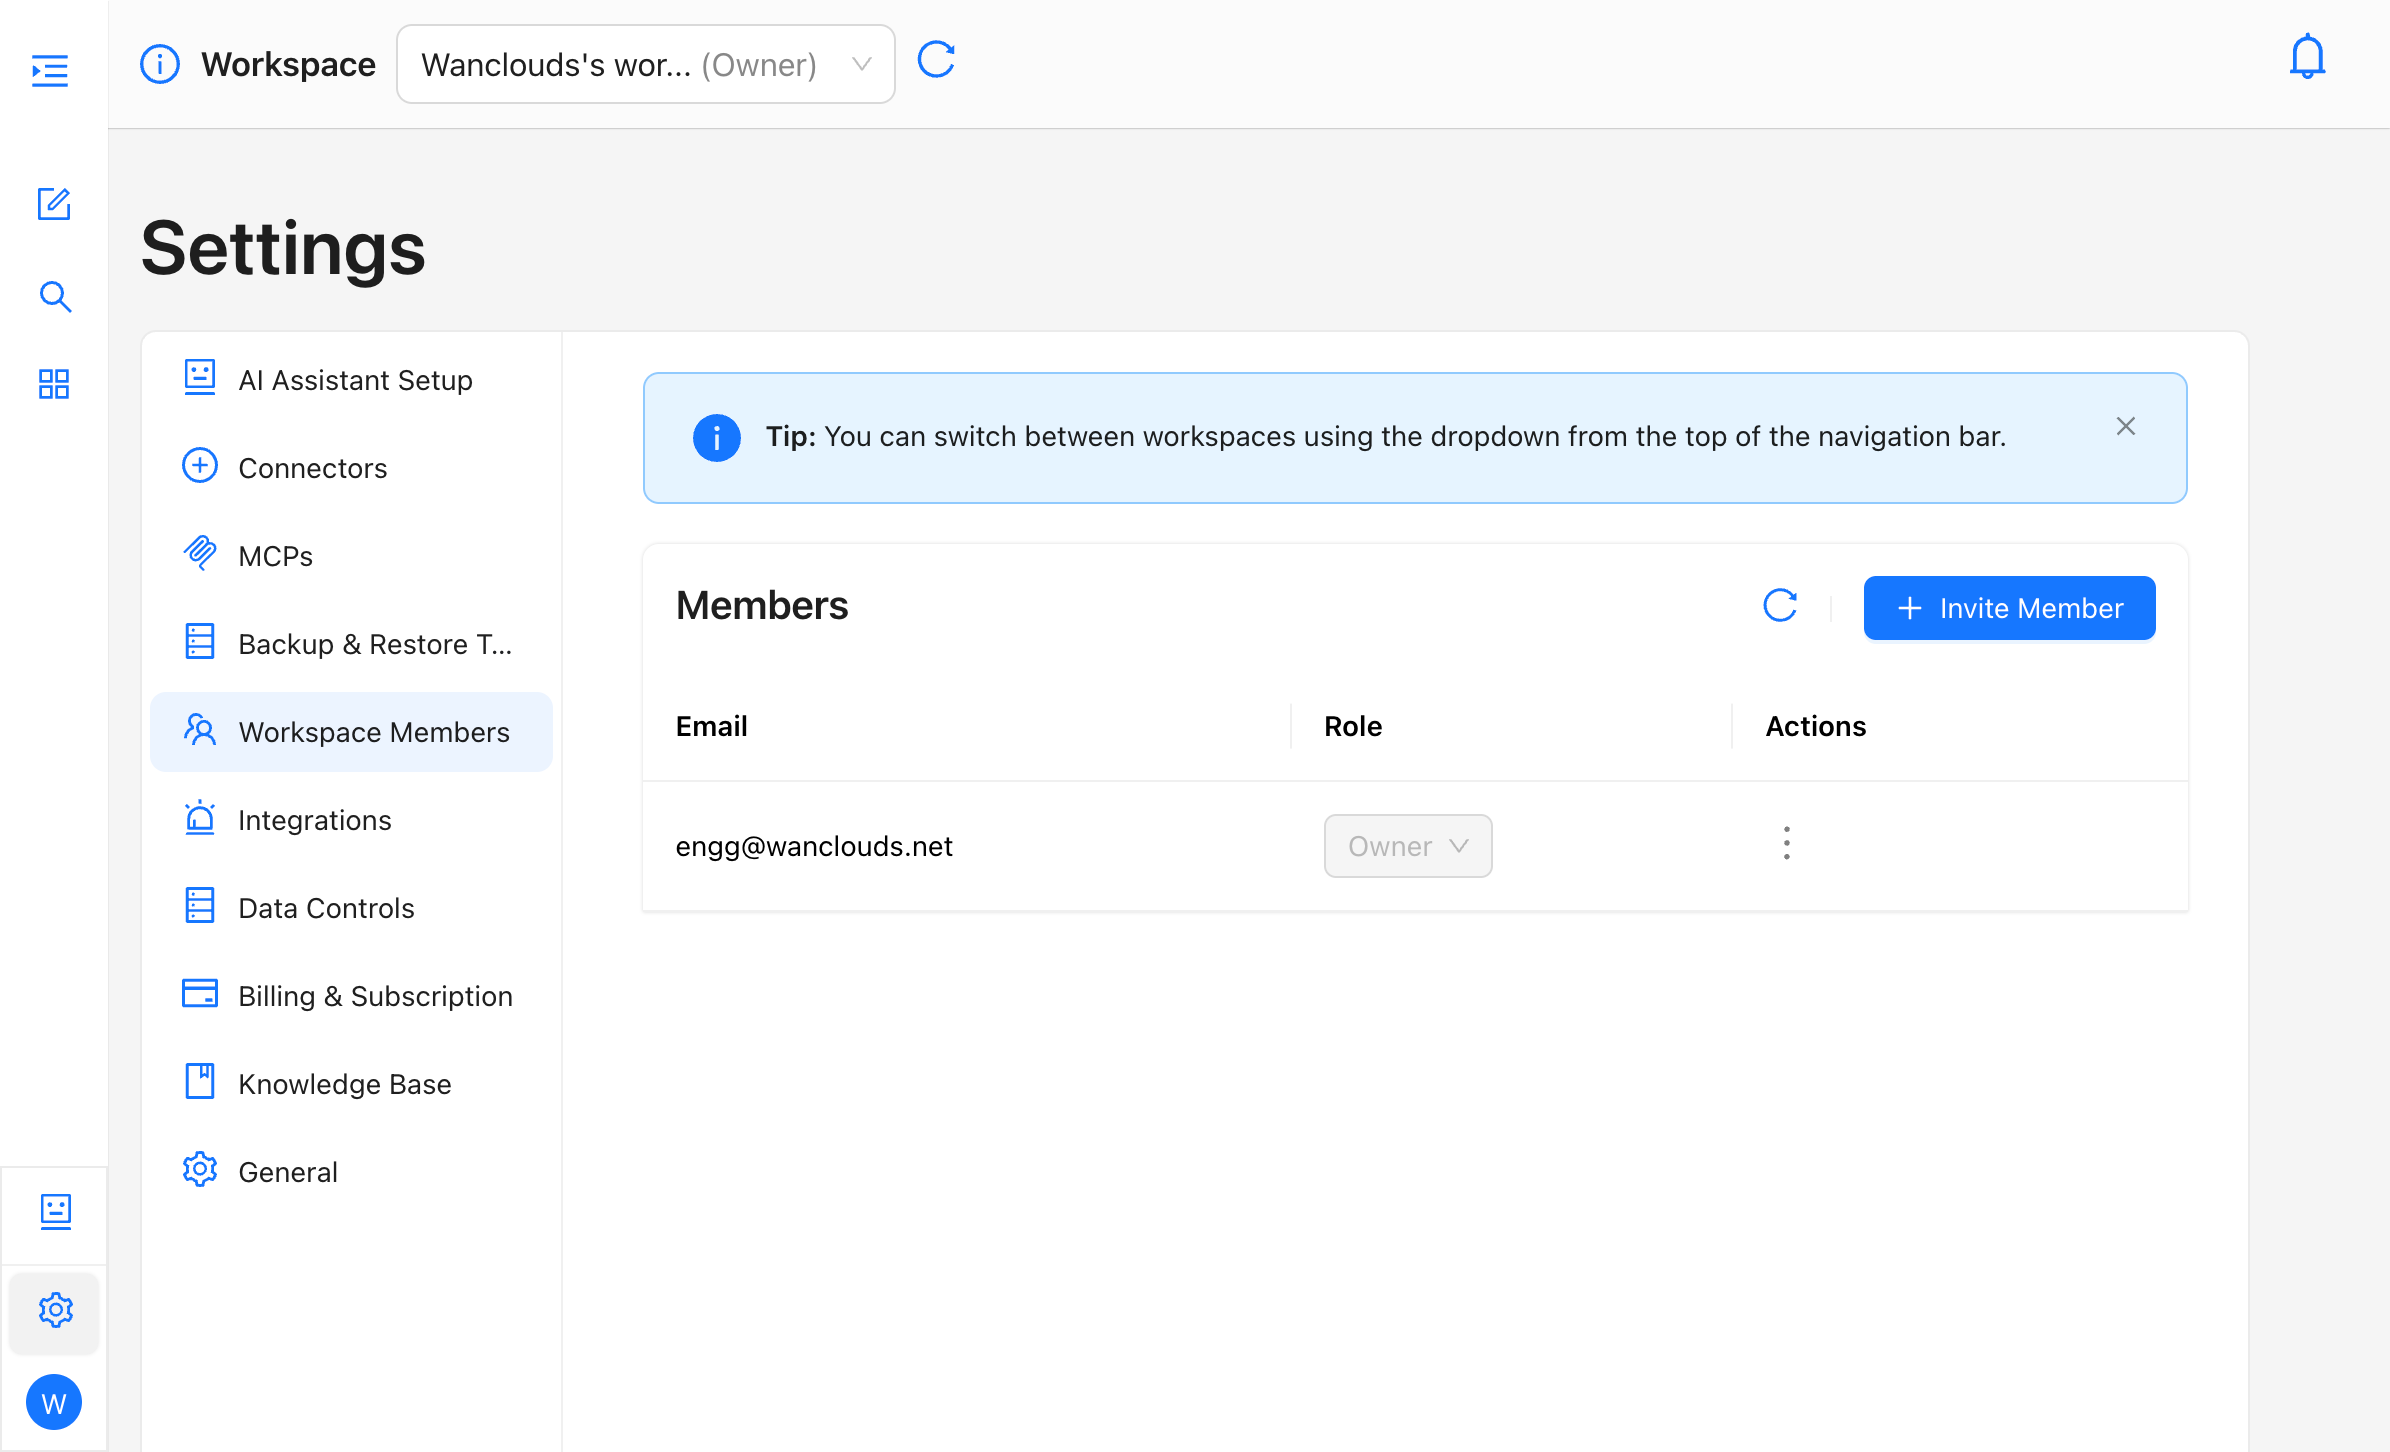
To access the Workspace Members page, navigate to Settings → Workspace Members in the sidebar.
Workspace sharing is only available on Premium and Custom plans.
Roles
Each member in the workspace is assigned one of the following roles:
- Owner: Full control over the workspace — manages members, billing, and all settings. Automatically assigned to the workspace creator and cannot be transferred or removed.
- Admin: Can manage workspace resources, including AI Assistants, cloud accounts and environments, MCPs, scheduled tasks, alerts and integrations, and connectors. Cannot manage billing or remove the Owner.
- Reader: View-only access. Can view and chat with existing assistants, and view chats, environments, scheduled tasks, alerts, and other workspace data, but cannot create, edit, or delete anything.
Only the Owner can invite new members, change member roles, and remove members from the workspace.
Inviting a Member
To invite a new member to your workspace:
- Navigate to Settings → Workspace Members in the sidebar.
- Click the + Invite Member button in the top-right corner of the Members section.
- The Invite team members form opens with the following fields:
- Email (required) — Enter the email address to invite.
- Role (required) — Choose the role to assign to the invited member (Admin or Reader).
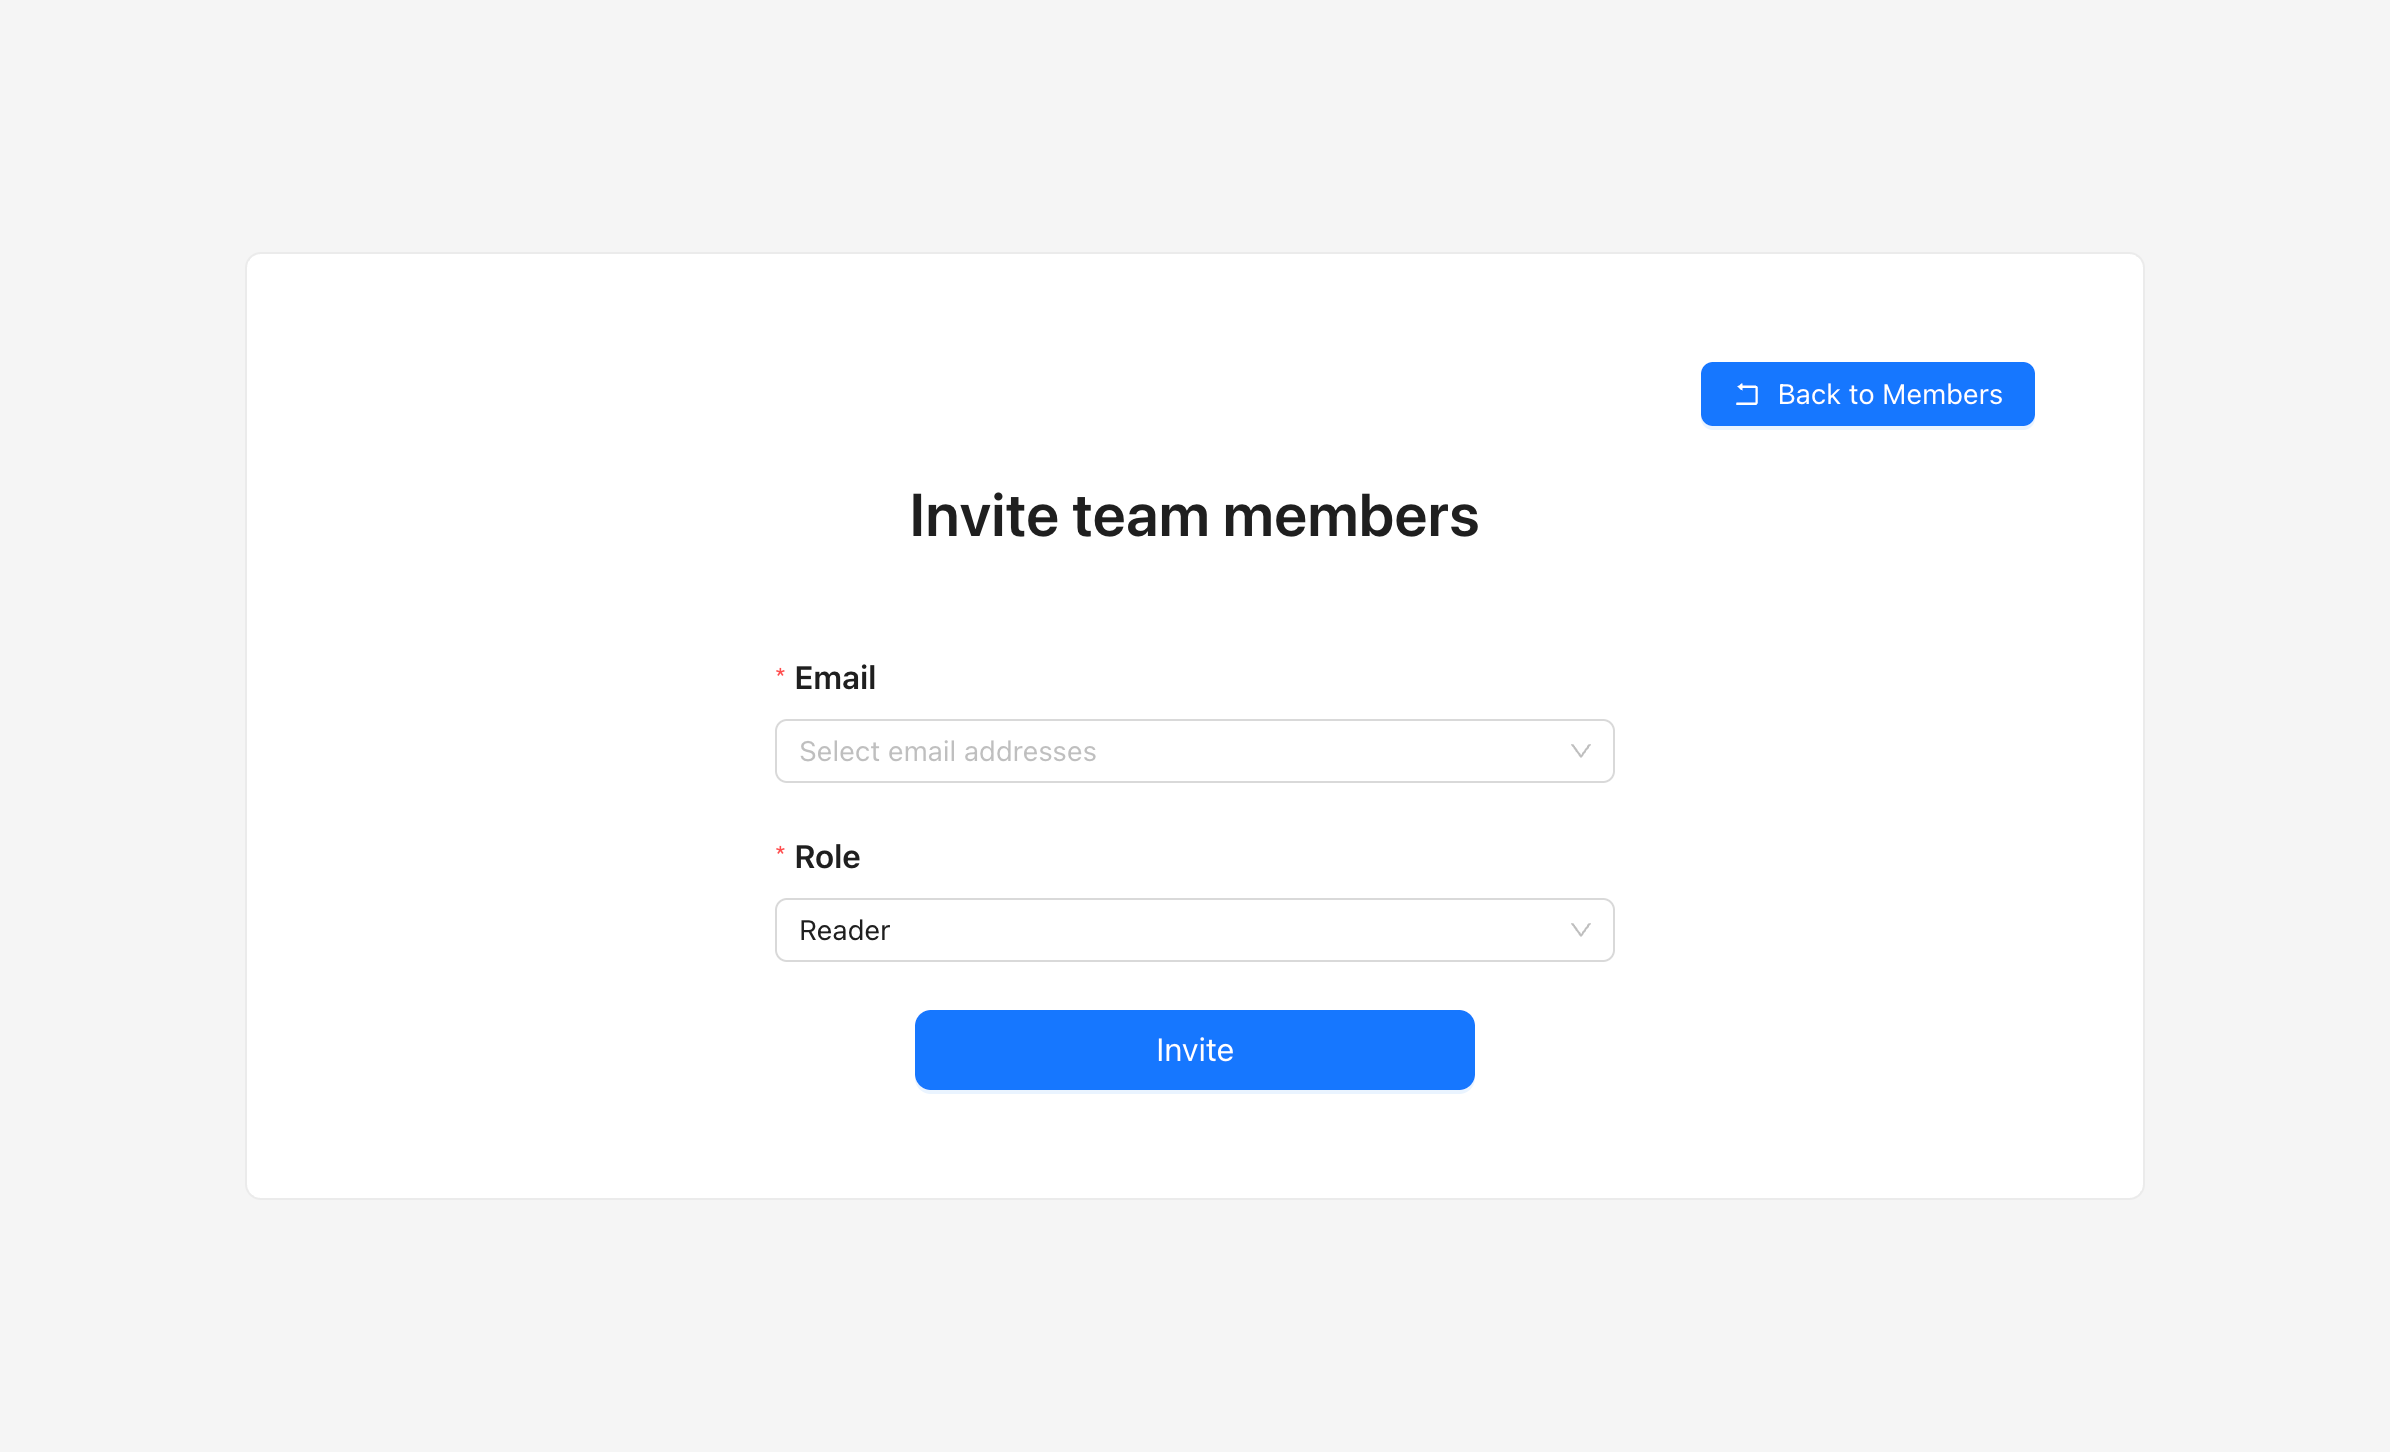
- Click the Invite button to send the invitation.
A confirmation appears once the invitation is sent. The invited member is added to the Members table immediately with an Invite Pending status.
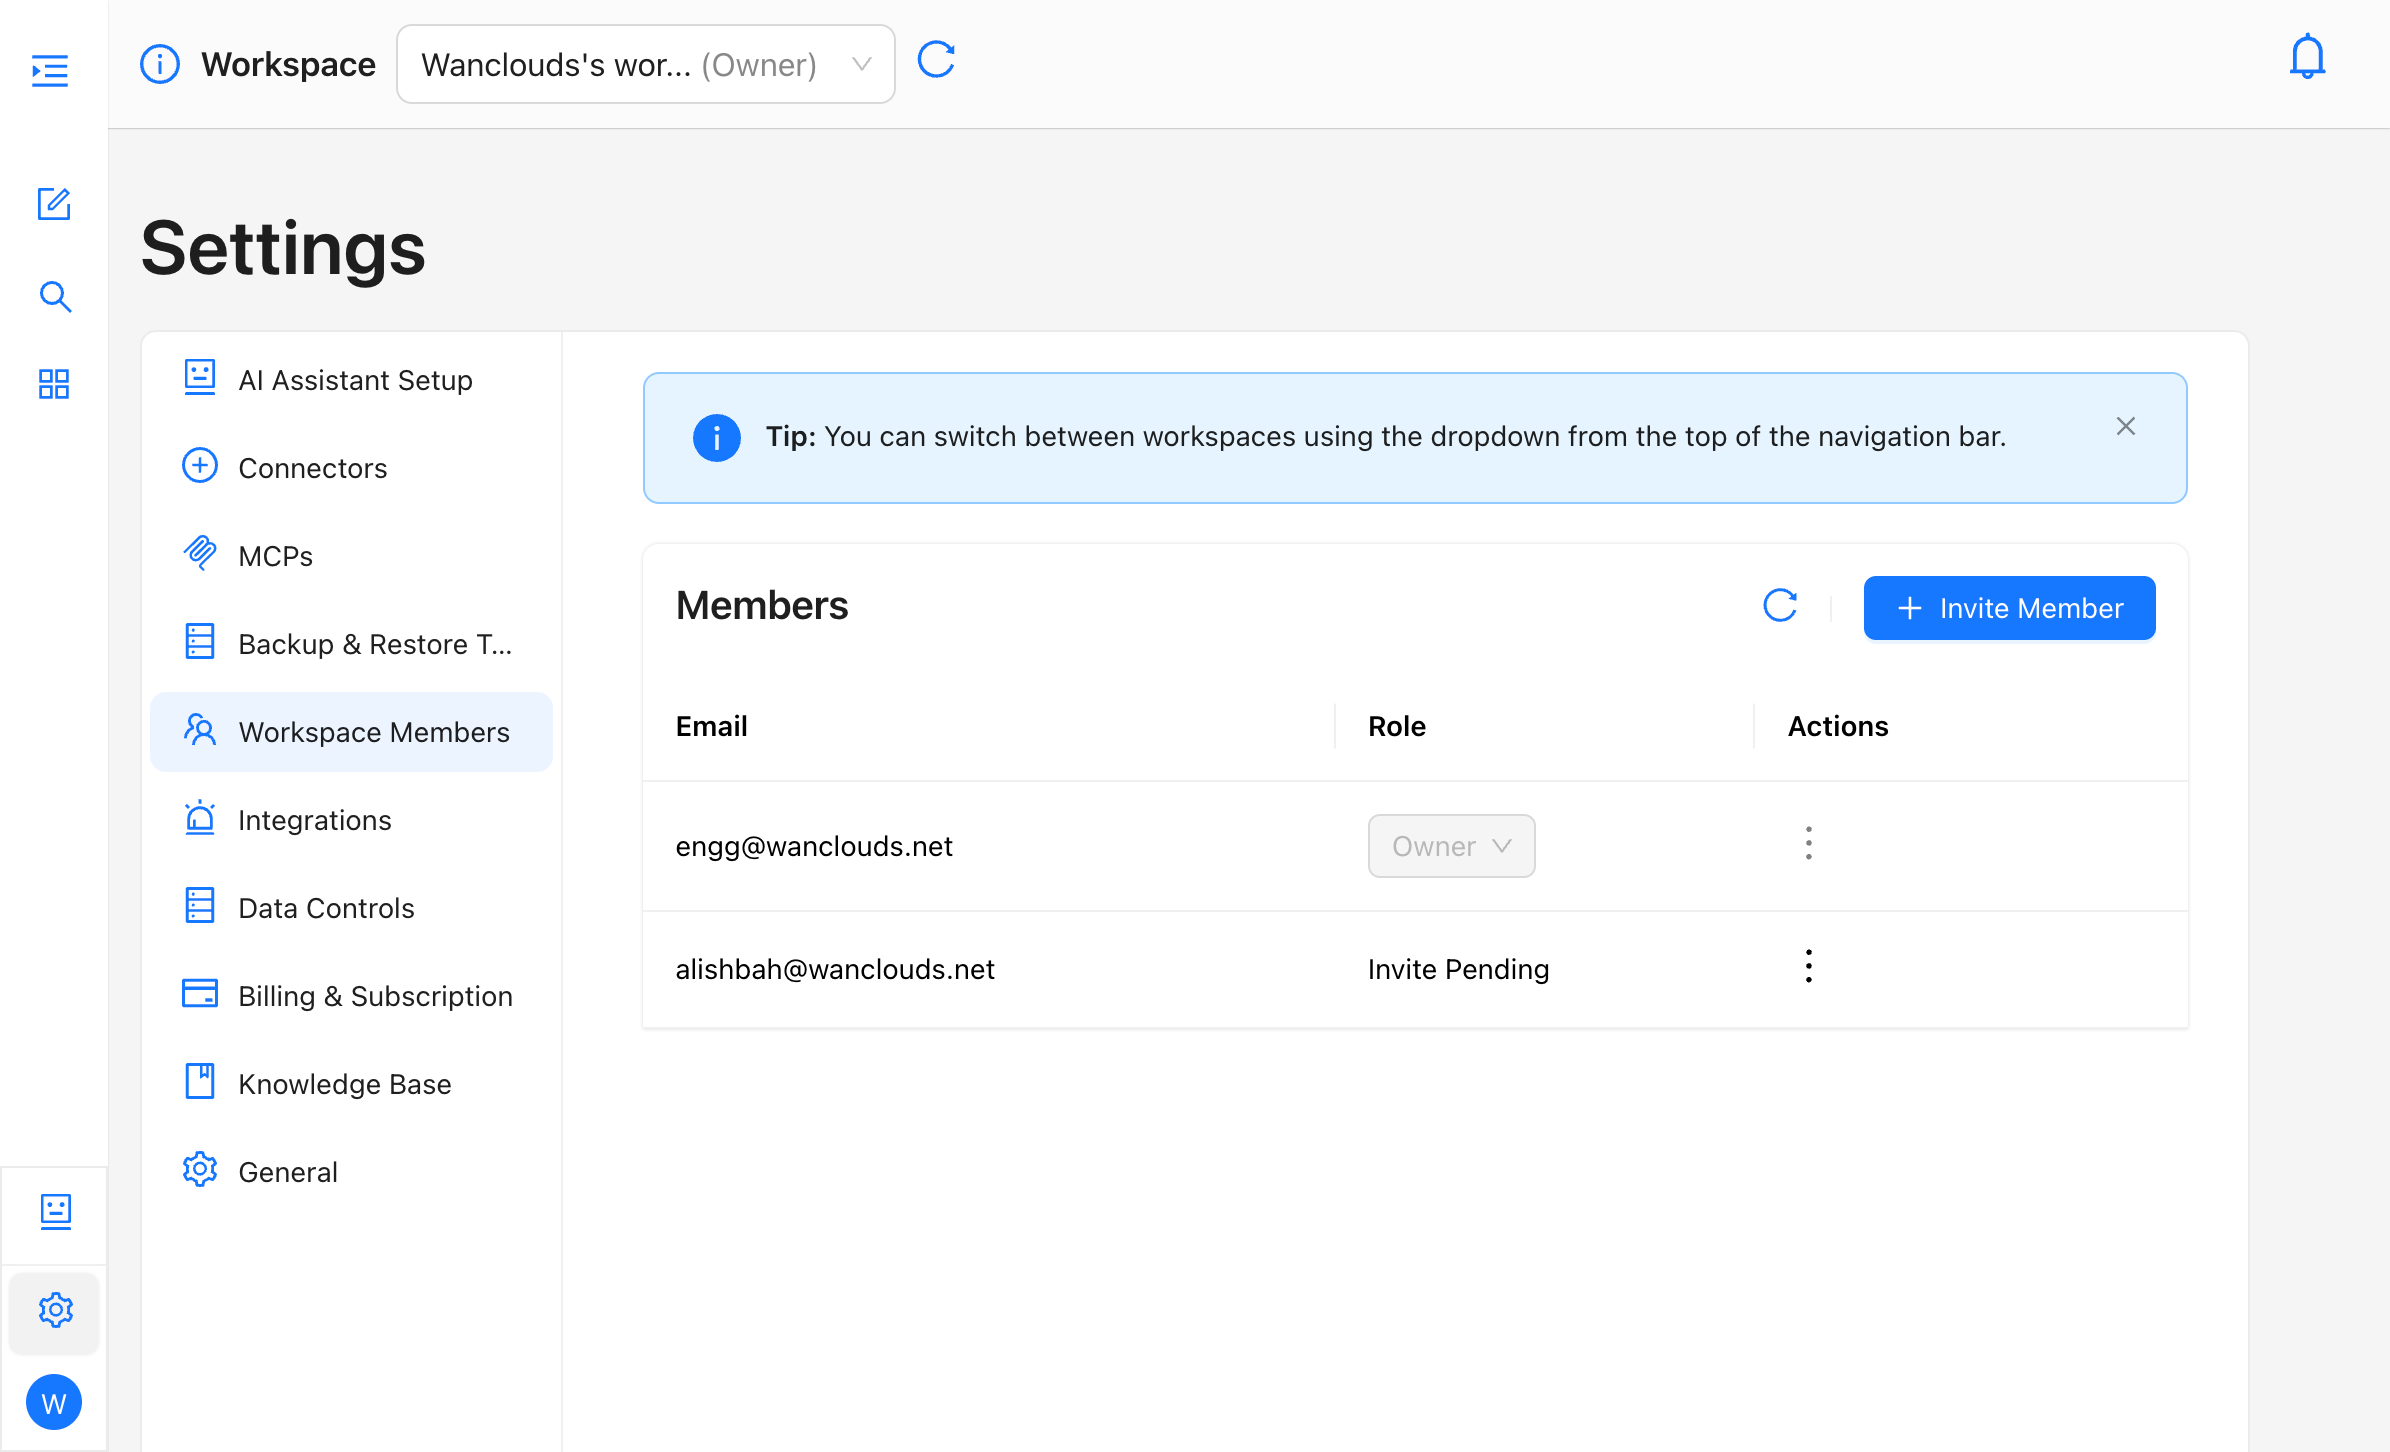
The invited member's role can be changed at any time after they have joined the workspace using the Role dropdown next to their name in the Members table.
The invited user must already have a registered Wanclouds AI account.
Accepting an Invitation
Once invited, the member receives an email containing a Join Workspace button.
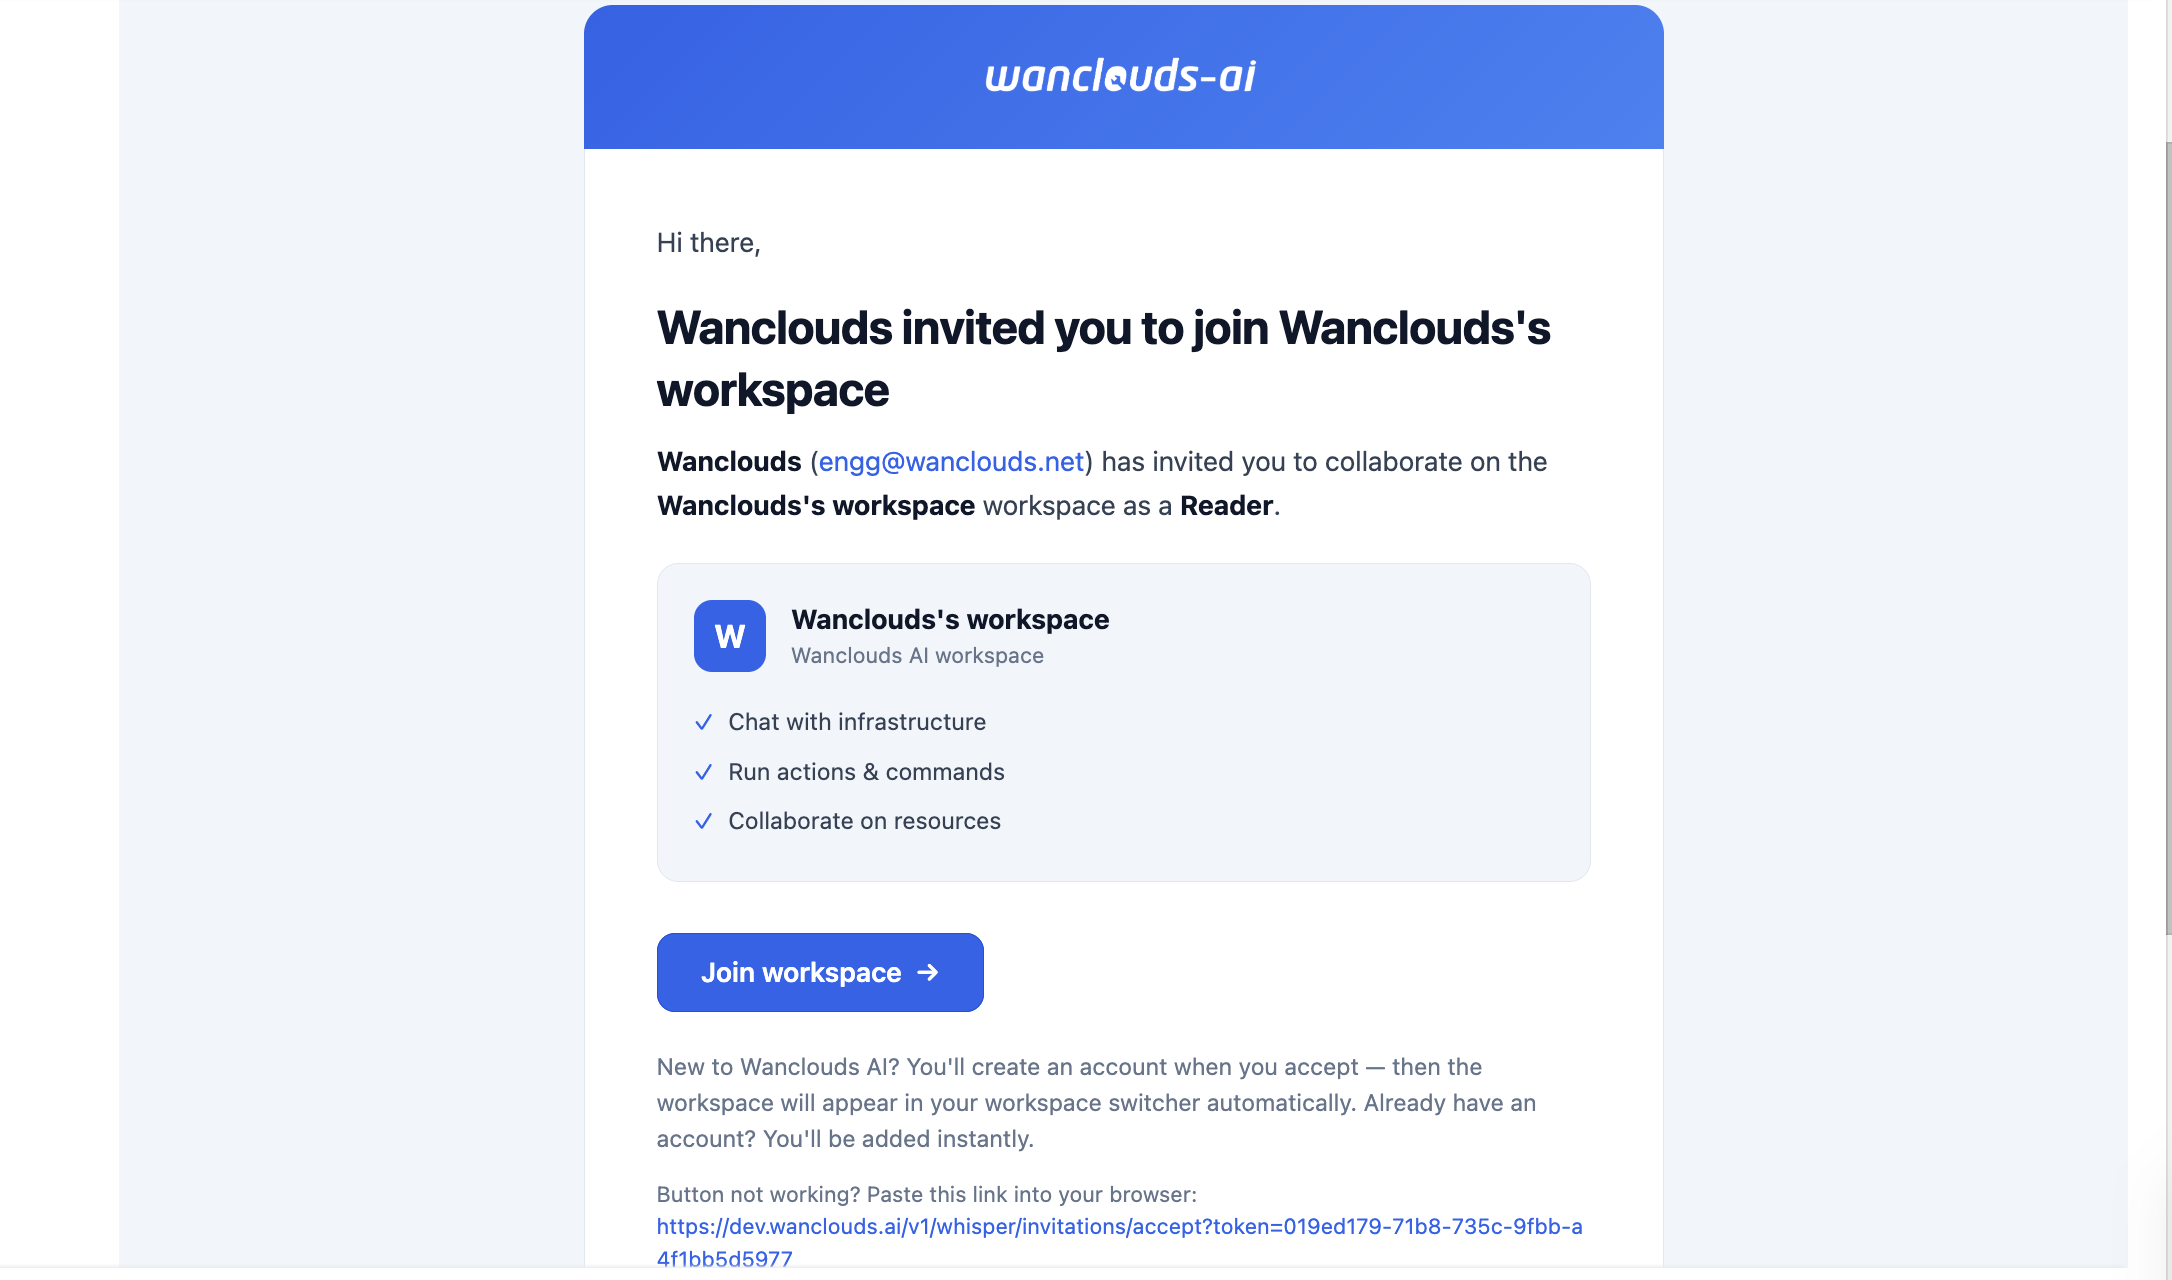
- If the user is not logged in: Clicking the link redirects them to the Wanclouds AI login page. After logging in they are automatically added to the workspace with the assigned role.
- If the user is already logged in: They are redirected directly to the application, and the shared workspace becomes available immediately.
Removing a Member
To remove a member from the workspace:
- Locate the member in the Members table.
- Click the ⋮ actions menu next to their name.
- Select Remove Member from the dropdown.
- Confirm the action in the confirmation dialog.
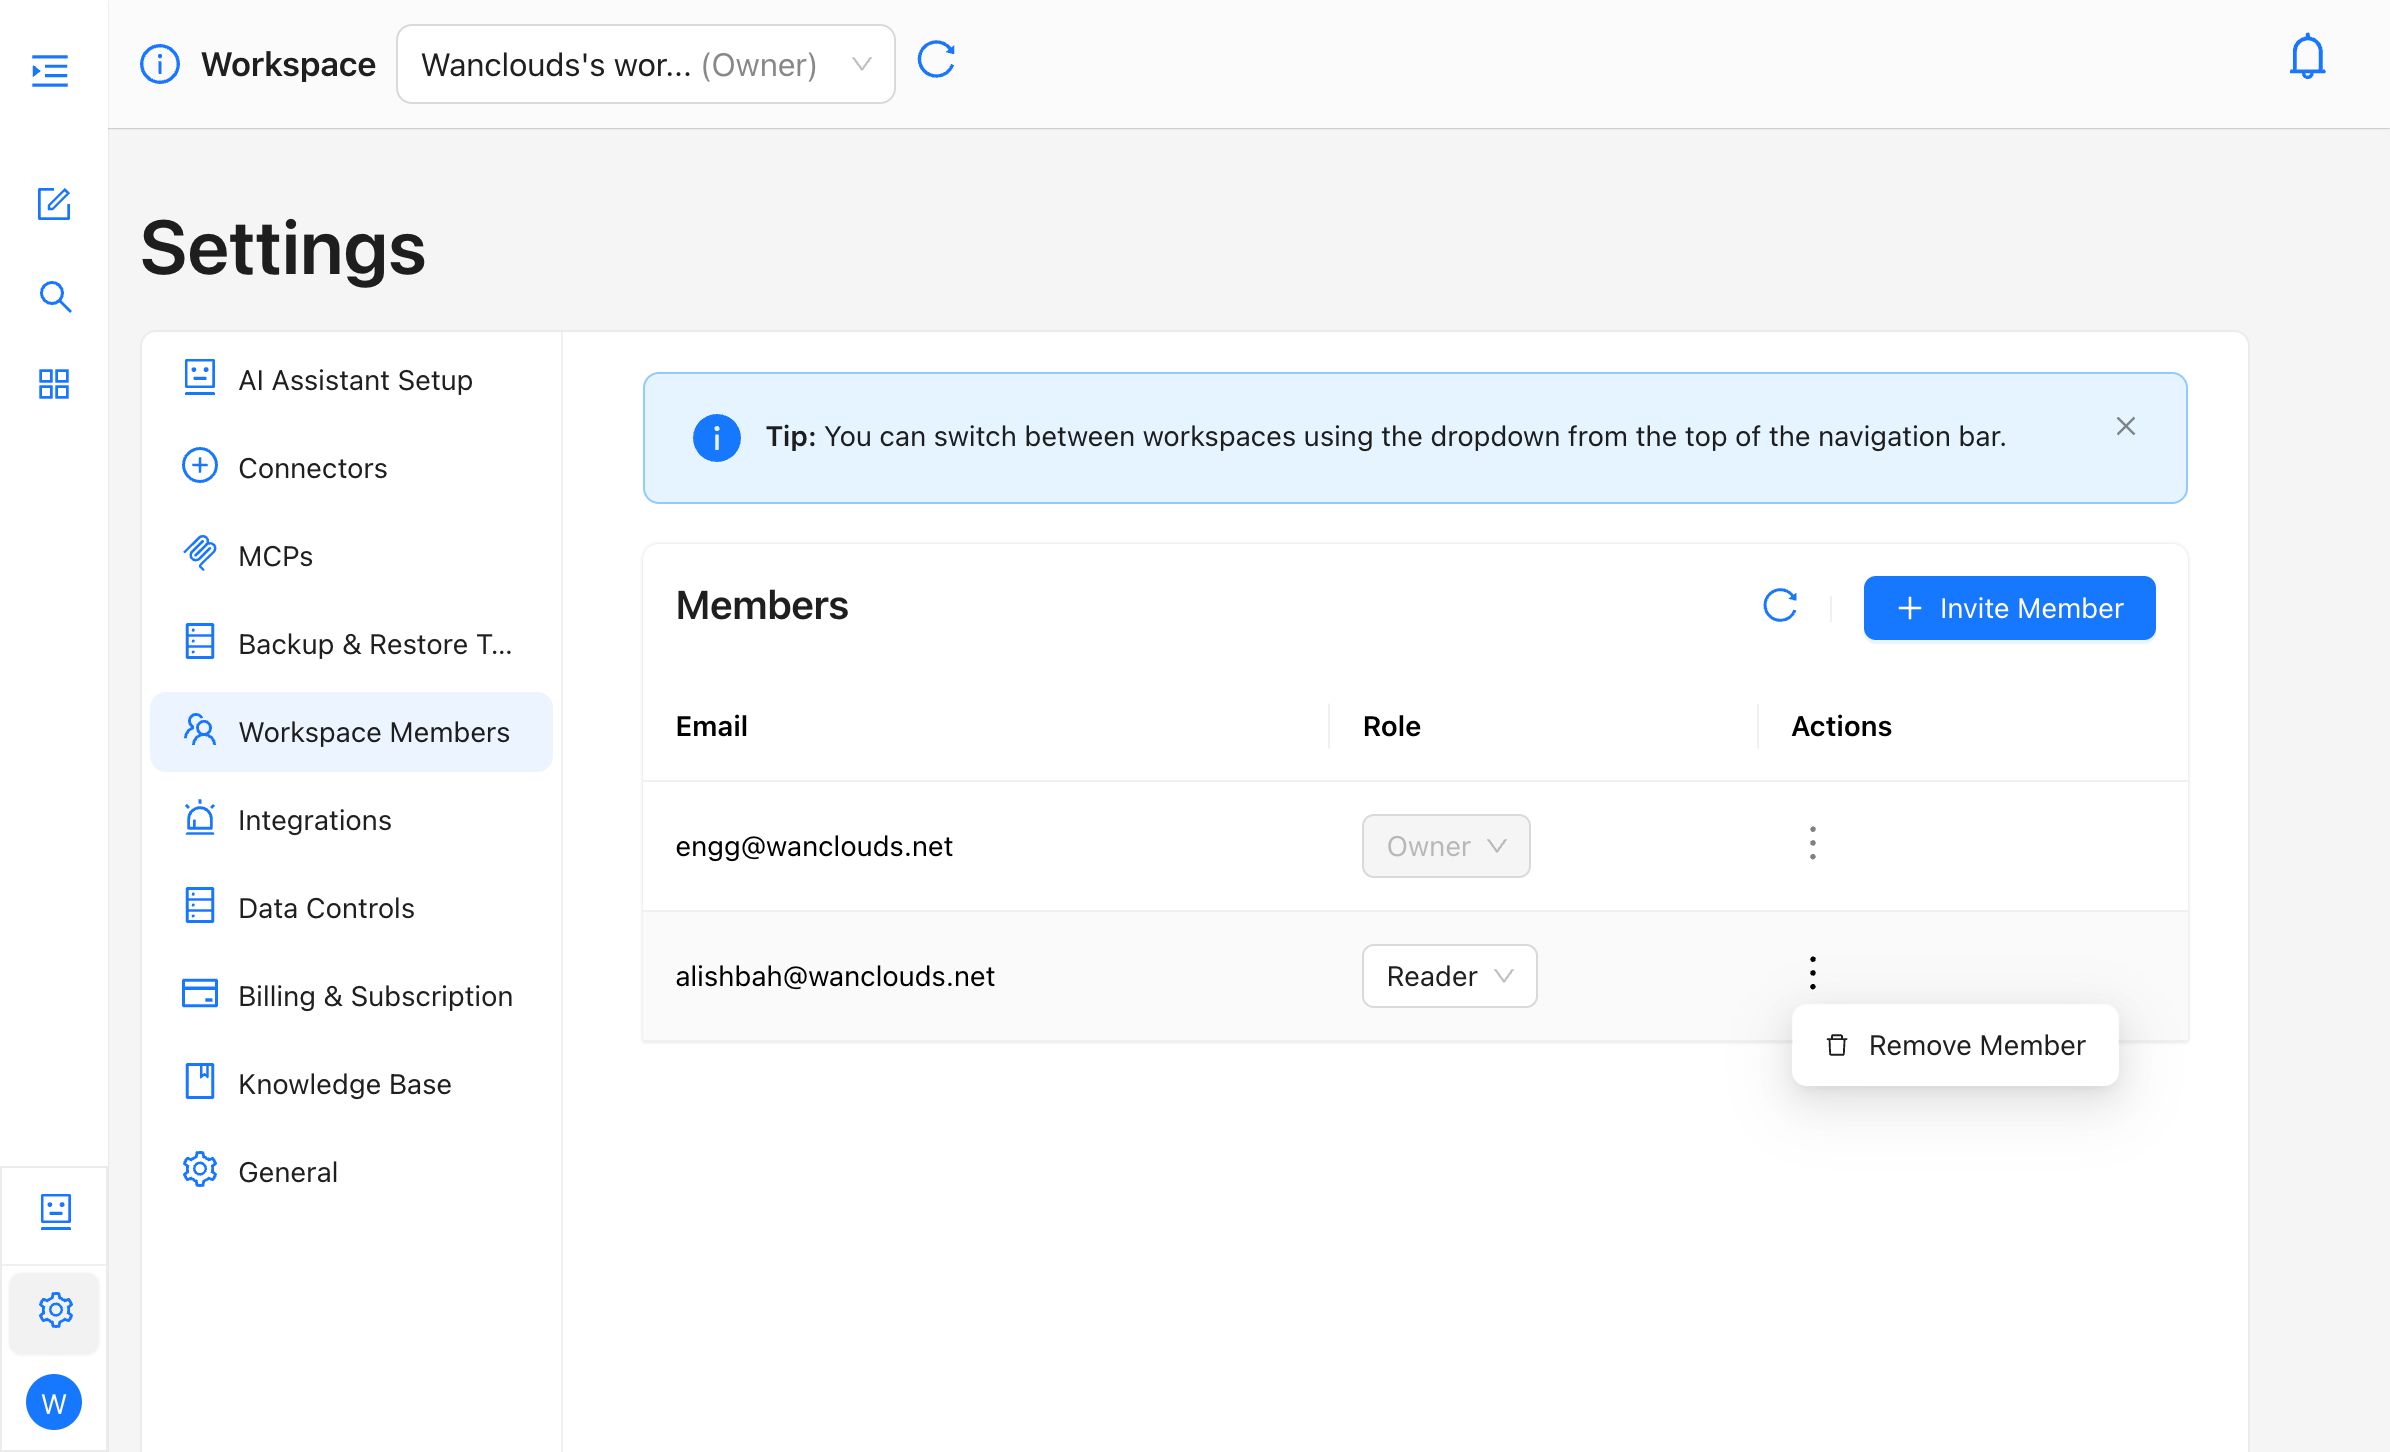
The member is removed immediately and loses all access to the workspace.
Removing a member is immediate. They will lose access to the workspace as soon as they are removed. To restore their access, you will need to invite them again.
Switching Between Workspaces
If you are a member of multiple workspaces, you can switch between them using the workspace dropdown in the top navigation bar.
Switching workspaces refreshes all workspace-scoped data — assistants, chats, environments, MCP configurations, scheduled tasks, and alerts — to reflect the newly selected workspace. Your access to each resource is determined by your assigned role in that workspace.