Create Your First AI Assistant
Ready to create your AI assistant? This guide will walk you through the setup process step-by-step.
If you want to understand what AI Assistants are and their capabilities before creating one, read the AI Assistant Overview first.
Creating Your AI Assistant
Follow these steps to create your AI Assistant:
- Navigate to AI Assistant Setup from sidebar or click on + icon infront of AI Assistant in sidebar.
- Click Setup AI Assistant button
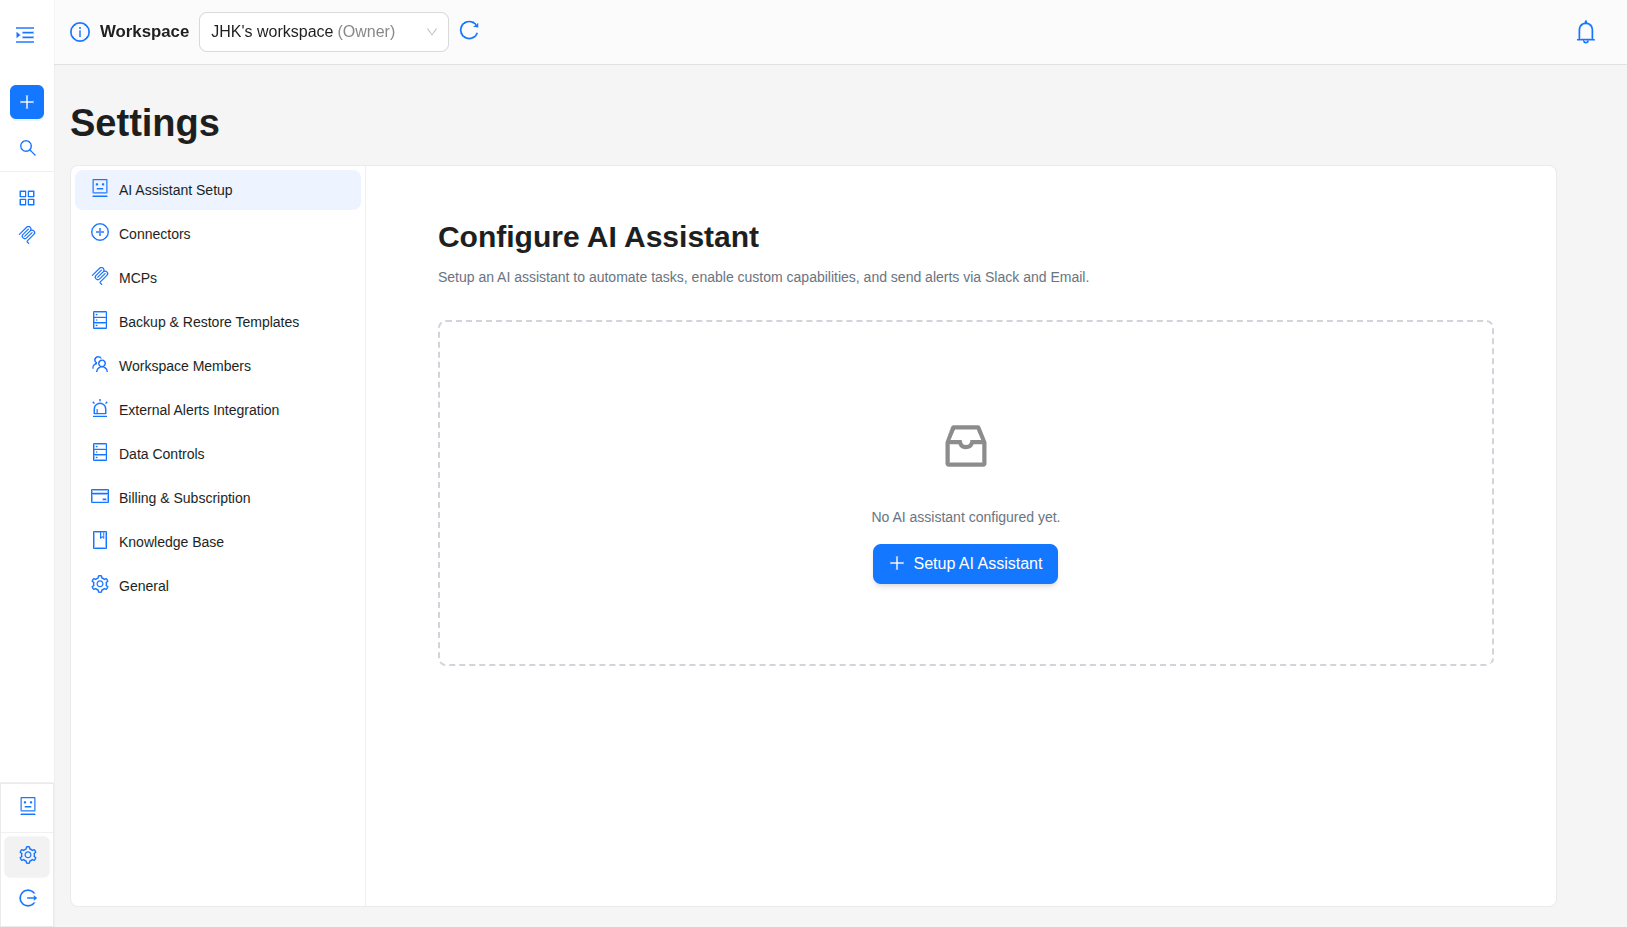
- You'll be taken to the Agent Setup Wizard
You can also access the agent creation wizard from the chat interface by clicking on the AI Assistants selector and choosing "Add Assistant".
Step 1: Environment Selection and Configuration
Configure your AI Assistant's environment, connectors, and MCPs in this step:
1.1: Assistant Name and Description
- Name – Give your assistant a descriptive name (e.g. “Production Infrastructure Assistant”, “Dev Environment Assistant”) so you can identify it when you have multiple assistants.
- Description – Optionally add a short description of what this assistant is for (e.g. scope, team, or environment). The name and description can be changed later if needed.
1.2: Environment Type Selection
Select one of the following environment types for the AI Assistant. Each assistant should be tied to a single environment type.
- On-Premise Infrastructure and Devices - For physical servers, local infrastructure, and on-premise devices
- IBM Cloud VPC - For IBM Cloud Virtual Private Cloud infrastructure
- MCP Only Mode - For assistants that work exclusively with Model Context Protocols (MCPs) without direct cloud connections
Environment Type Details:
- On-Premise Infrastructure and Devices: Best for traditional data centers, physical servers, and local network infrastructure
- IBM Cloud VPC: Connects directly to your IBM Cloud VPC resources for cloud-native infrastructure management
- MCP Only Mode: Ideal when you want to use only MCP integrations without connecting cloud accounts directly

Choose environment type carefully—you cannot change it after the assistant is created. If you need a different environment later, create a new assistant.
1.3: Attach Connectors
If you selected On-Premise Infrastructure and Devices or IBM Cloud VPC:
a. View Existing Connectors:
- If you have connectors already set up, they will be listed
- Attach one connector per assistant: select the connector that matches the assistant’s environment
b. Add New Connectors (if needed):
- If you don't have connectors yet, click Add Connector
- Follow the connector setup wizard to configure your first connector
- See Connector Setup Guide for detailed instructions
c. Select Connector:
- Select the single connector from the list to attach to the assistant
- Each assistant is tied to one connector for a clear, focused context
Need help setting up connectors? Learn more about connecting your environment and configuring connectors for your infrastructure.
1.4: Attach MCPs
MCP Requirements:
- On-Premise and IBM Cloud VPC: MCPs are optional but recommended for enhanced capabilities
- MCP Only Mode: MCPs are mandatory - you must attach at least one MCP
MCP Only Mode uses external MCPs (Model Context Protocols) for context and data sources. You must attach at least one MCP to proceed—the assistant relies on these integrations in this mode.
a. View Available MCPs:
- See a list of available MCPs ( CloudWatch, SolarWinds etc.)
- Each MCP shows its capabilities and status
b. Add New MCPs (if needed):
- Click Configure MCP to set up a new MCP
- Follow the MCP configuration wizard
- See MCP Setup Guide for detailed instructions on configuring MCPs
c. Select MCPs:
- Select the MCPs from the list you want to attach to assistant
- You can attach multiple MCPs for comprehensive observability
- Review each MCP's capabilities to ensure it meets your needs
Learn more about MCPs and their capabilities to understand which MCPs best fit your infrastructure monitoring needs.
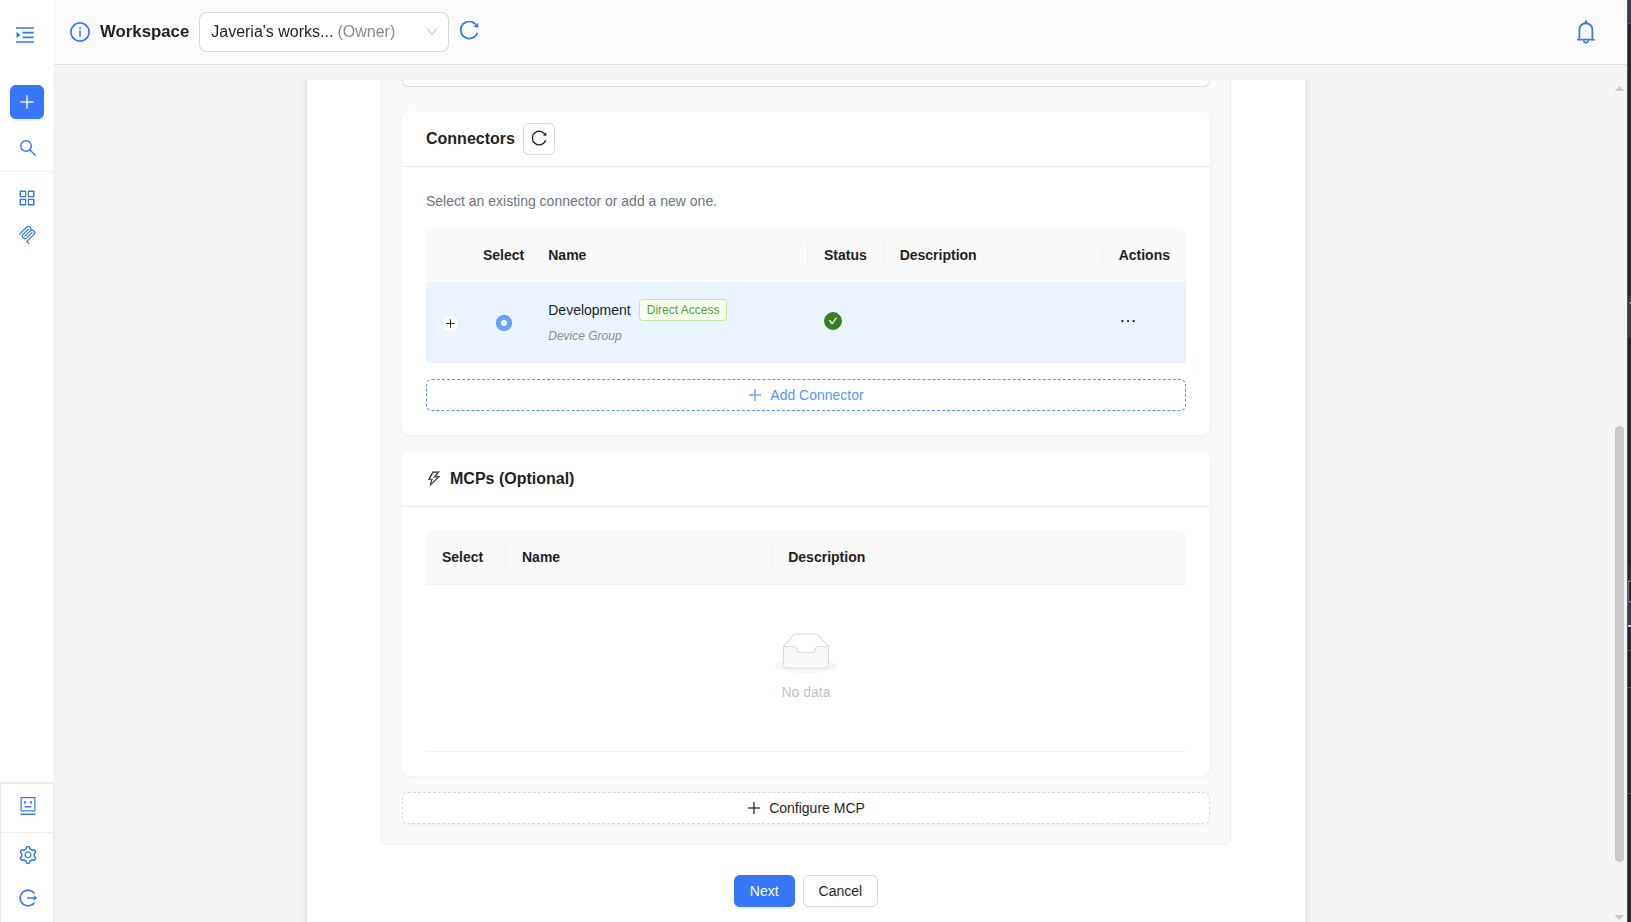
- Click Next to proceed to capability configuration
Step 2: Capability Configuration
Configure what your assistant can do. Available capabilities depend on the environment type you selected:
For On-Premise Infrastructure and Devices
You can enable these capabilities:
-
Intelligent Troubleshooting
- Diagnoses and resolves on-premises infrastructure and device issues
- Provides SSH access for remote diagnostics and remediation
- Performs root cause analysis and guided remediation
- Required Tool: SSH Manager
-
Resource Monitoring
- Monitors on-premises infrastructure and devices
- Tracks performance metrics, resource utilization, and health status
- Connects to monitoring tools
- Supported Tools: Prometheus, Zabbix
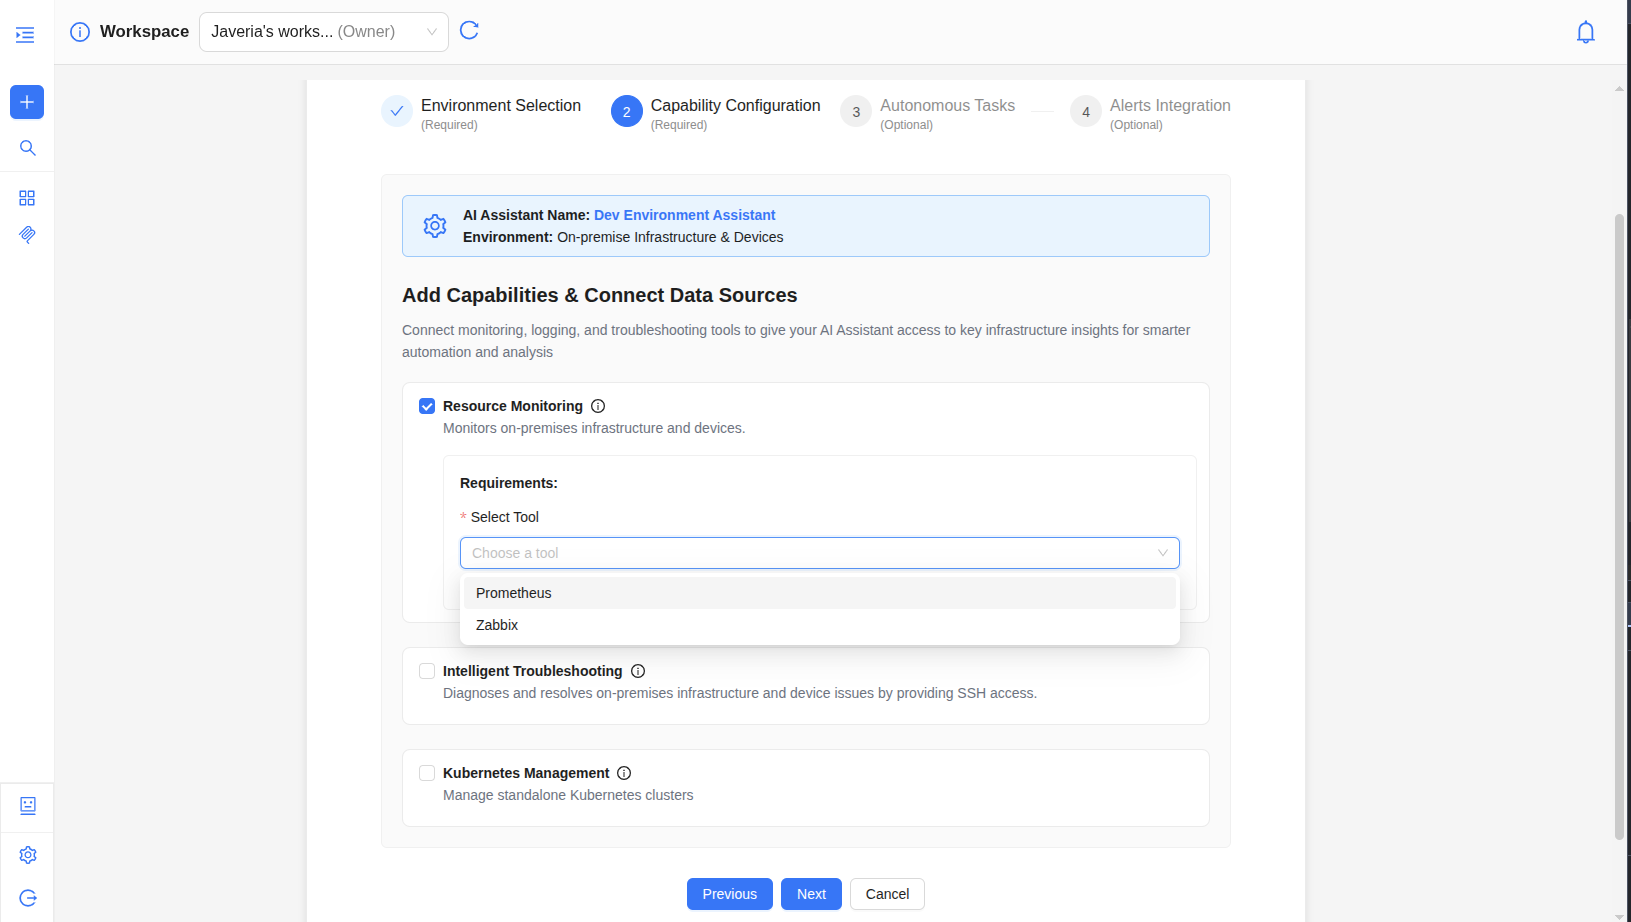
- Kubernetes Management
- Manage standalone Kubernetes clusters
- Monitor cluster health and resource usage
- Analyze pod and node performance
- Configure and troubleshoot Kubernetes resources
For IBM Cloud VPC
You get the same capabilities as on-premise—Intelligent Troubleshooting, Resource monitoring and Kubernetes management—plus one additional capability:
- Log Analysis – Process and analyze logs from your VPC and connected sources (e.g. system, application, and security logs). The assistant can search logs, spot errors and patterns, and help with troubleshooting and compliance.
You can enable any of these in the capability configuration step.
For MCP Only Mode
Capabilities for MCP Only Mode are coming soon.
Configuring Capabilities
- Select the capabilities you want to enable
- Review the requirements for each capability (some may require specific connectors or MCPs)
- Start with essential capabilities and add more later
Click Next to continue to autonomous tasks configuration
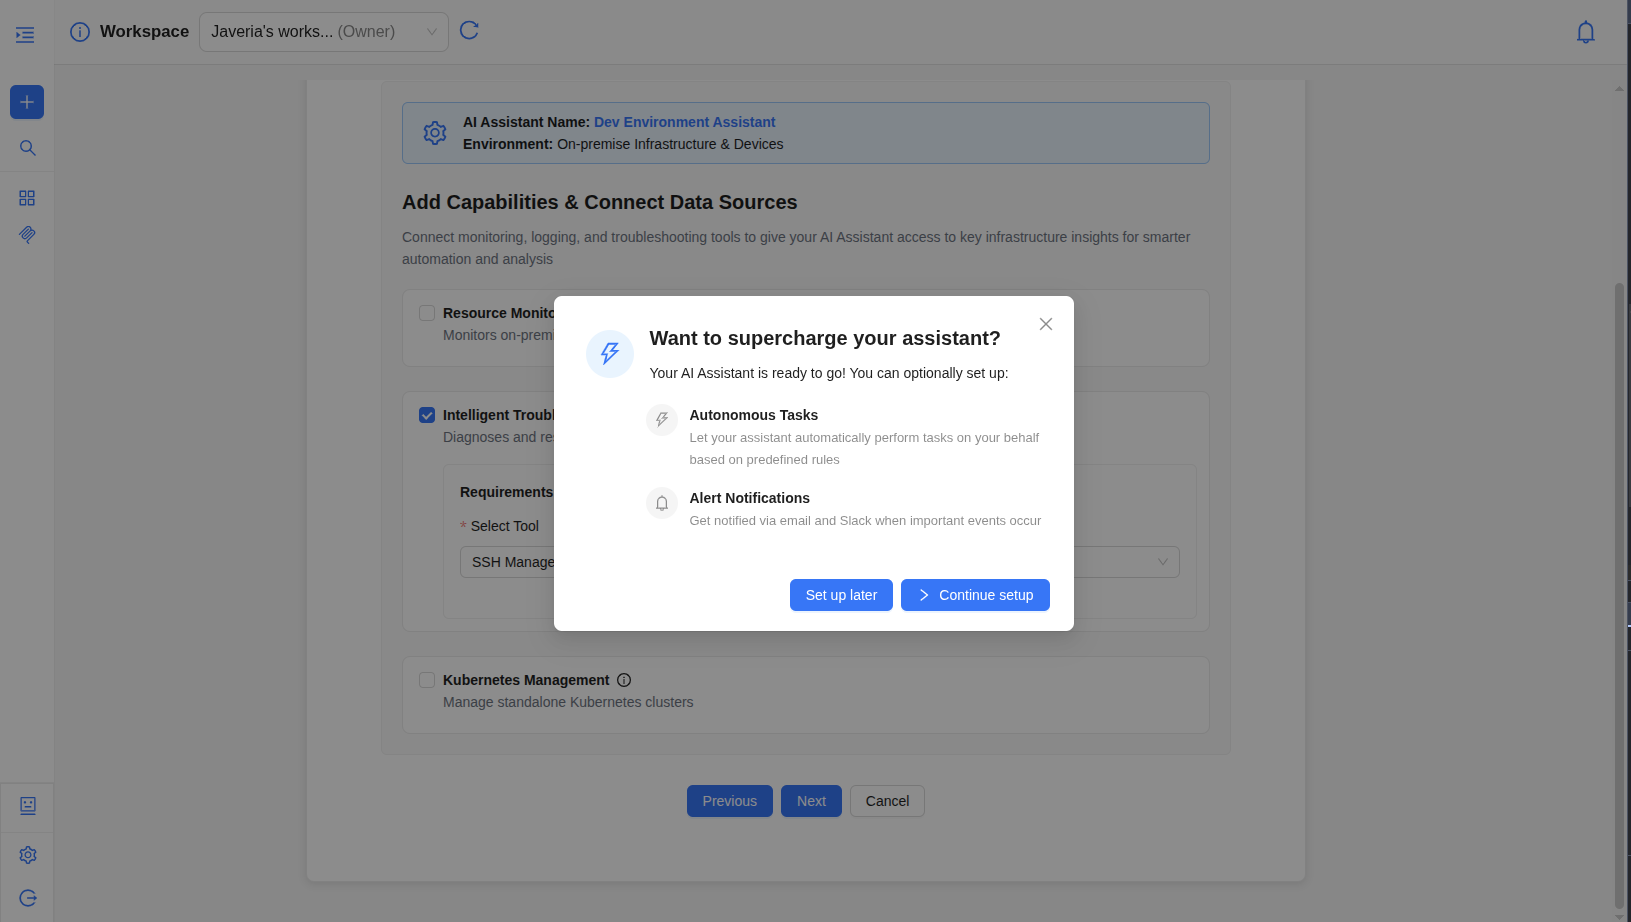
Your AI Assistant is ready to go! You can optionally set up:
- Autonomous Tasks - Let your assistant automatically perform tasks on your behalf based on predefined rules
- Alert Notifications - Get notified via email and Slack when important events occur
These features are completely optional. You can skip them now and configure them later if needed. Your assistant will work perfectly fine without them.
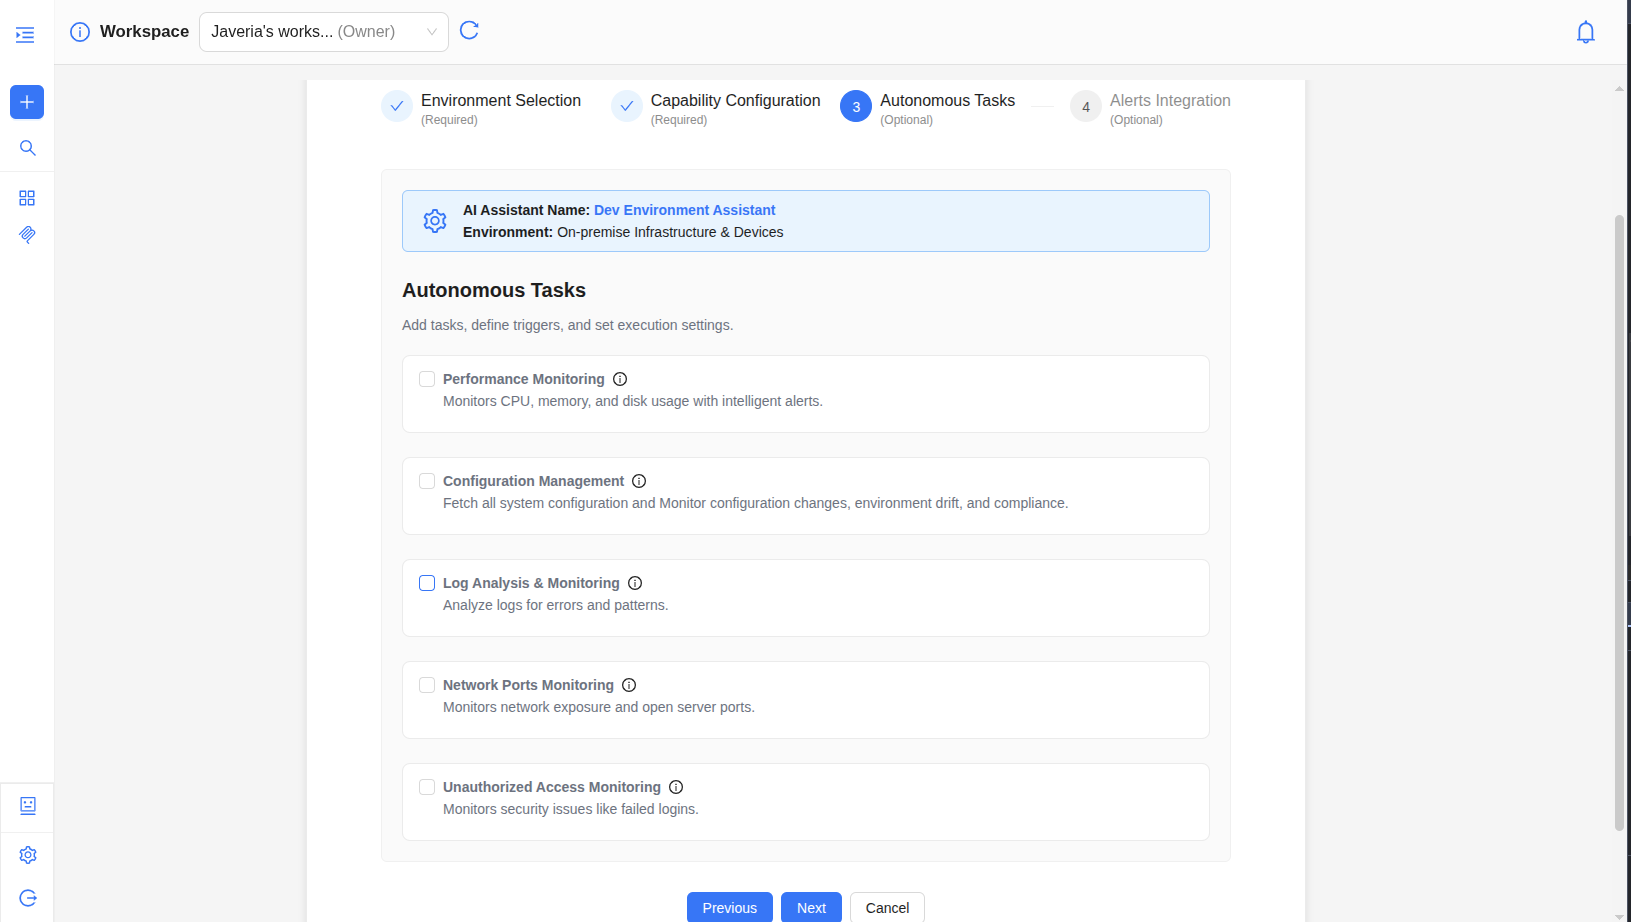
Step 3: Autonomous Tasks (Optional)
Add tasks, define triggers, and set execution settings. Configure autonomous tasks that your assistant can perform automatically:
-
Available Autonomous Tasks:
-
Performance Monitoring
- Monitors CPU, memory, and disk usage with intelligent alerts
- Check Frequency: Set how often the system checks resource usage (e.g., Every 5 minutes)
- CPU Usage Exceeds Threshold: Default 90%
- Memory Usage Exceeds Threshold: Default 85%
- Disk Usage Exceeds Threshold: Default 90%
-
Configuration Management
- Fetches all system configuration and monitors configuration changes, environment drift, and compliance
- Check Frequency: Set how often the system checks for configuration changes (e.g., Every 5 minutes)
- System Configuration: Monitor system configuration changes
- Security Permission: Monitor security permission changes
- Software Updates: Monitor software update status
-
Log Analysis & Monitoring
- Analyzes logs for errors and patterns
- Check Frequency: Set how often the system analyzes logs (e.g., Every 5 minutes)
- Log Categories to Monitor: Select which log categories to monitor:
- System Logs
- Security Logs
- Authentication Logs
- Application Logs
- Service Logs
- Network Logs
-
Network Ports Monitoring
- Monitors network exposure and open server ports
- Check Frequency: Set how often the system checks network ports (e.g., Hourly)
- Server Ports to Monitor (Alert on Blocked Ports Being Opened): Enter comma-separated port numbers (e.g., 22,80,443,3389)
-
Unauthorized Access Monitoring
- Monitors security issues like failed logins
- Detects suspicious access attempts and potential breaches
- Alerts on authentication failures and security events
- Check Frequency: Set how often the system checks for unauthorized access attempts (e.g., Hourly)
- Failed Login Attempts: Alert threshold for failed login attempts (e.g., 5 attempts/hour)
-
-
Configure Task Settings:
- Add Tasks: Select which autonomous tasks to enable
- Define Triggers: Set conditions that trigger task execution
- Set Execution Settings: Configure schedules and frequency
- Click Next to proceed to alerts integration
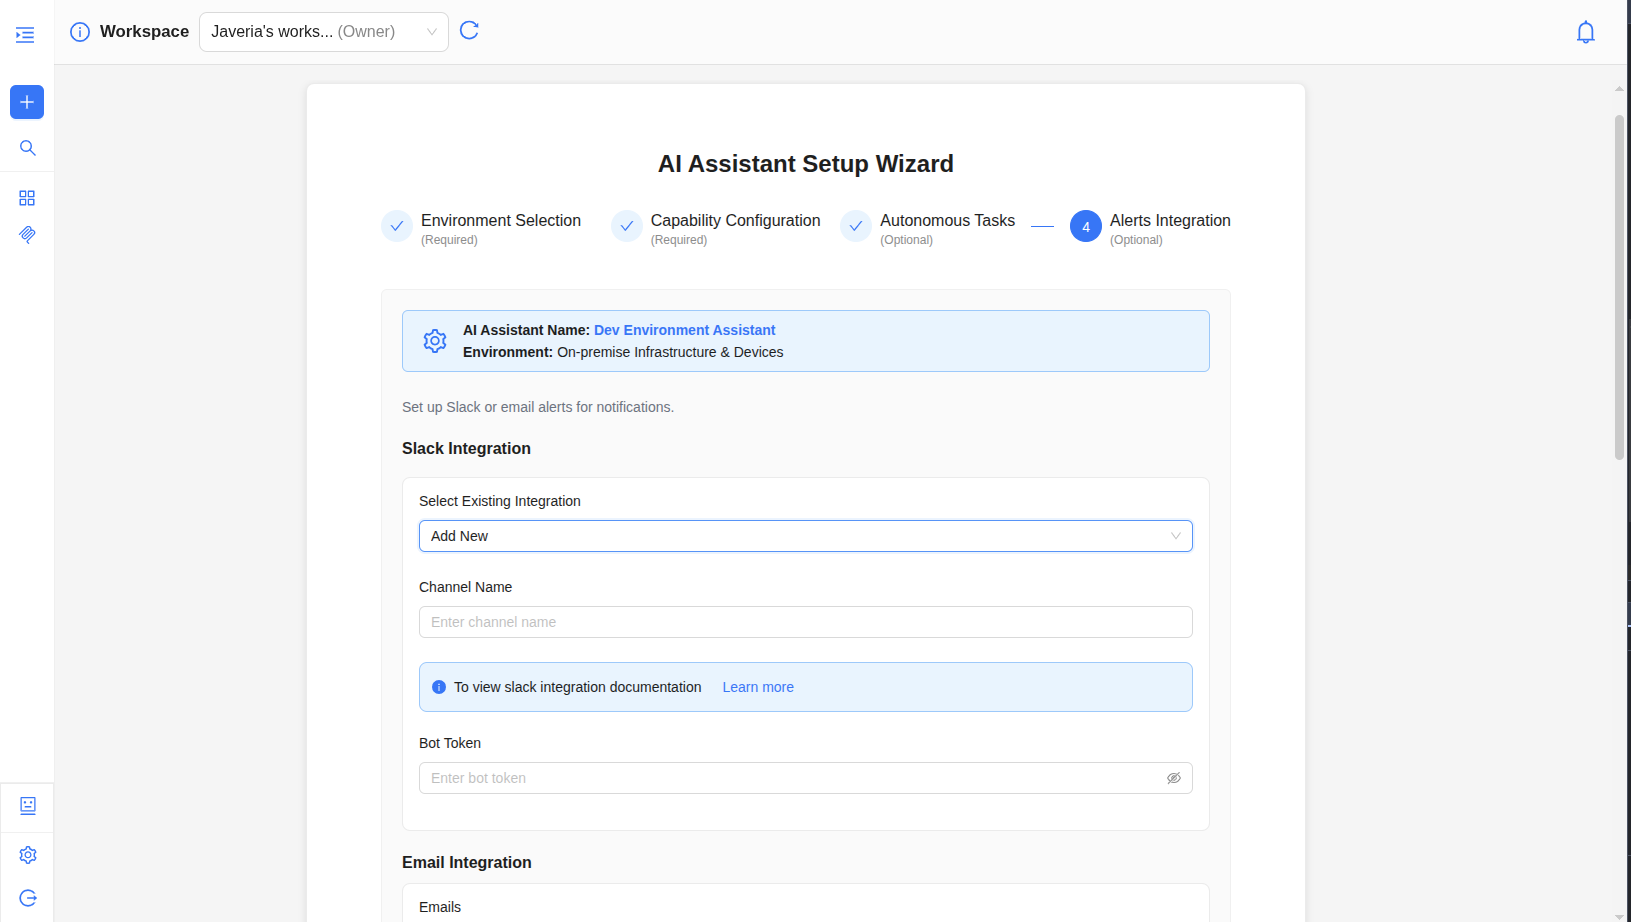
Step 4: Alerts Integration (Optional)
Connect external alerting systems to receive notifications:
4.1: Slack Integration
Configure Slack notifications for your AI assistant:
-
Select Existing Integration:
- Choose an existing Slack integration from the dropdown, or
- Select Add New to create a new integration
-
Channel Name:
- Enter the Slack channel name where you want to receive notifications
- The channel must exist in your Slack workspace
-
Bot Token:
- Enter your Slack bot token
To view Slack integration documentation, click Learn more.
4.2: Email Integration
Configure email notifications:
- Add Email Addresses:
- Enter email addresses in the Emails field
- You can add multiple email addresses
- Each email address will receive alert notifications
You can add multiple email addresses to receive notifications. All added emails will be notified when alerts are triggered.
4.3: Knowledge Base (Optional)
Enhance your AI assistant's knowledge with custom documents:
- Upload Documents: Upload documents to enhance your AI assistant's knowledge
- Link Documents: Select documents to link with this assistant
- Documents in the knowledge base help the assistant provide more accurate and context-aware responses
The Knowledge Base is optional. You can skip this section and add documents later if needed.
- Click Done to complete the setup
Using Your AI Assistant
After creation, your assistant is ready to use:
- Access in Chat - Your AI Assistant is automatically available in the chat interface
- Select Assistant - Choose your assistant from the AI Assistant selector from sidebar
- Start Chatting - Ask questions to you assistant
AI Assistant Management
Viewing All AI Assistants
- Go to Settings → AI Assistant Setup
- See all configured AI Assistants
Editing an Assistant
Modify an assistant's configuration, capabilities, or integrations at any time.
Steps to Edit
- Locate the assistant you want to modify in the list
- Click the ⋮ (three-dot menu) icon on the right
- Select "Edit Assistant" from the dropdown
Most settings can be modified without recreating the assistant. Changes take effect immediately for new conversations.
Deleting an Assistant
- Find the assistant you want to remove
- Click the ⋮ (three-dot menu) icon
- Select "Delete Assistant"
Deleting an AI Assistant will remove all its configuration, history, and autonomous task schedules. This action cannot be undone.
Next Steps
Now that your AI Assistant is created:
- Start Chatting - Ask questions to your AI Assistant and see it in action
- Explore Product Features - Learn about advanced AI Assistant capabilities