Integrations
Configure third-party integrations to extend Wanclouds AI capabilities for real-time alerting, team collaboration, and zero-trust credential management. Wanclouds AI supports Slack and Email for notification delivery, and Privilege Access Management (PAM) via BeyondTrust for secure infrastructure credential retrieval.
To access Integrations, navigate to Settings → Integrations in the sidebar.
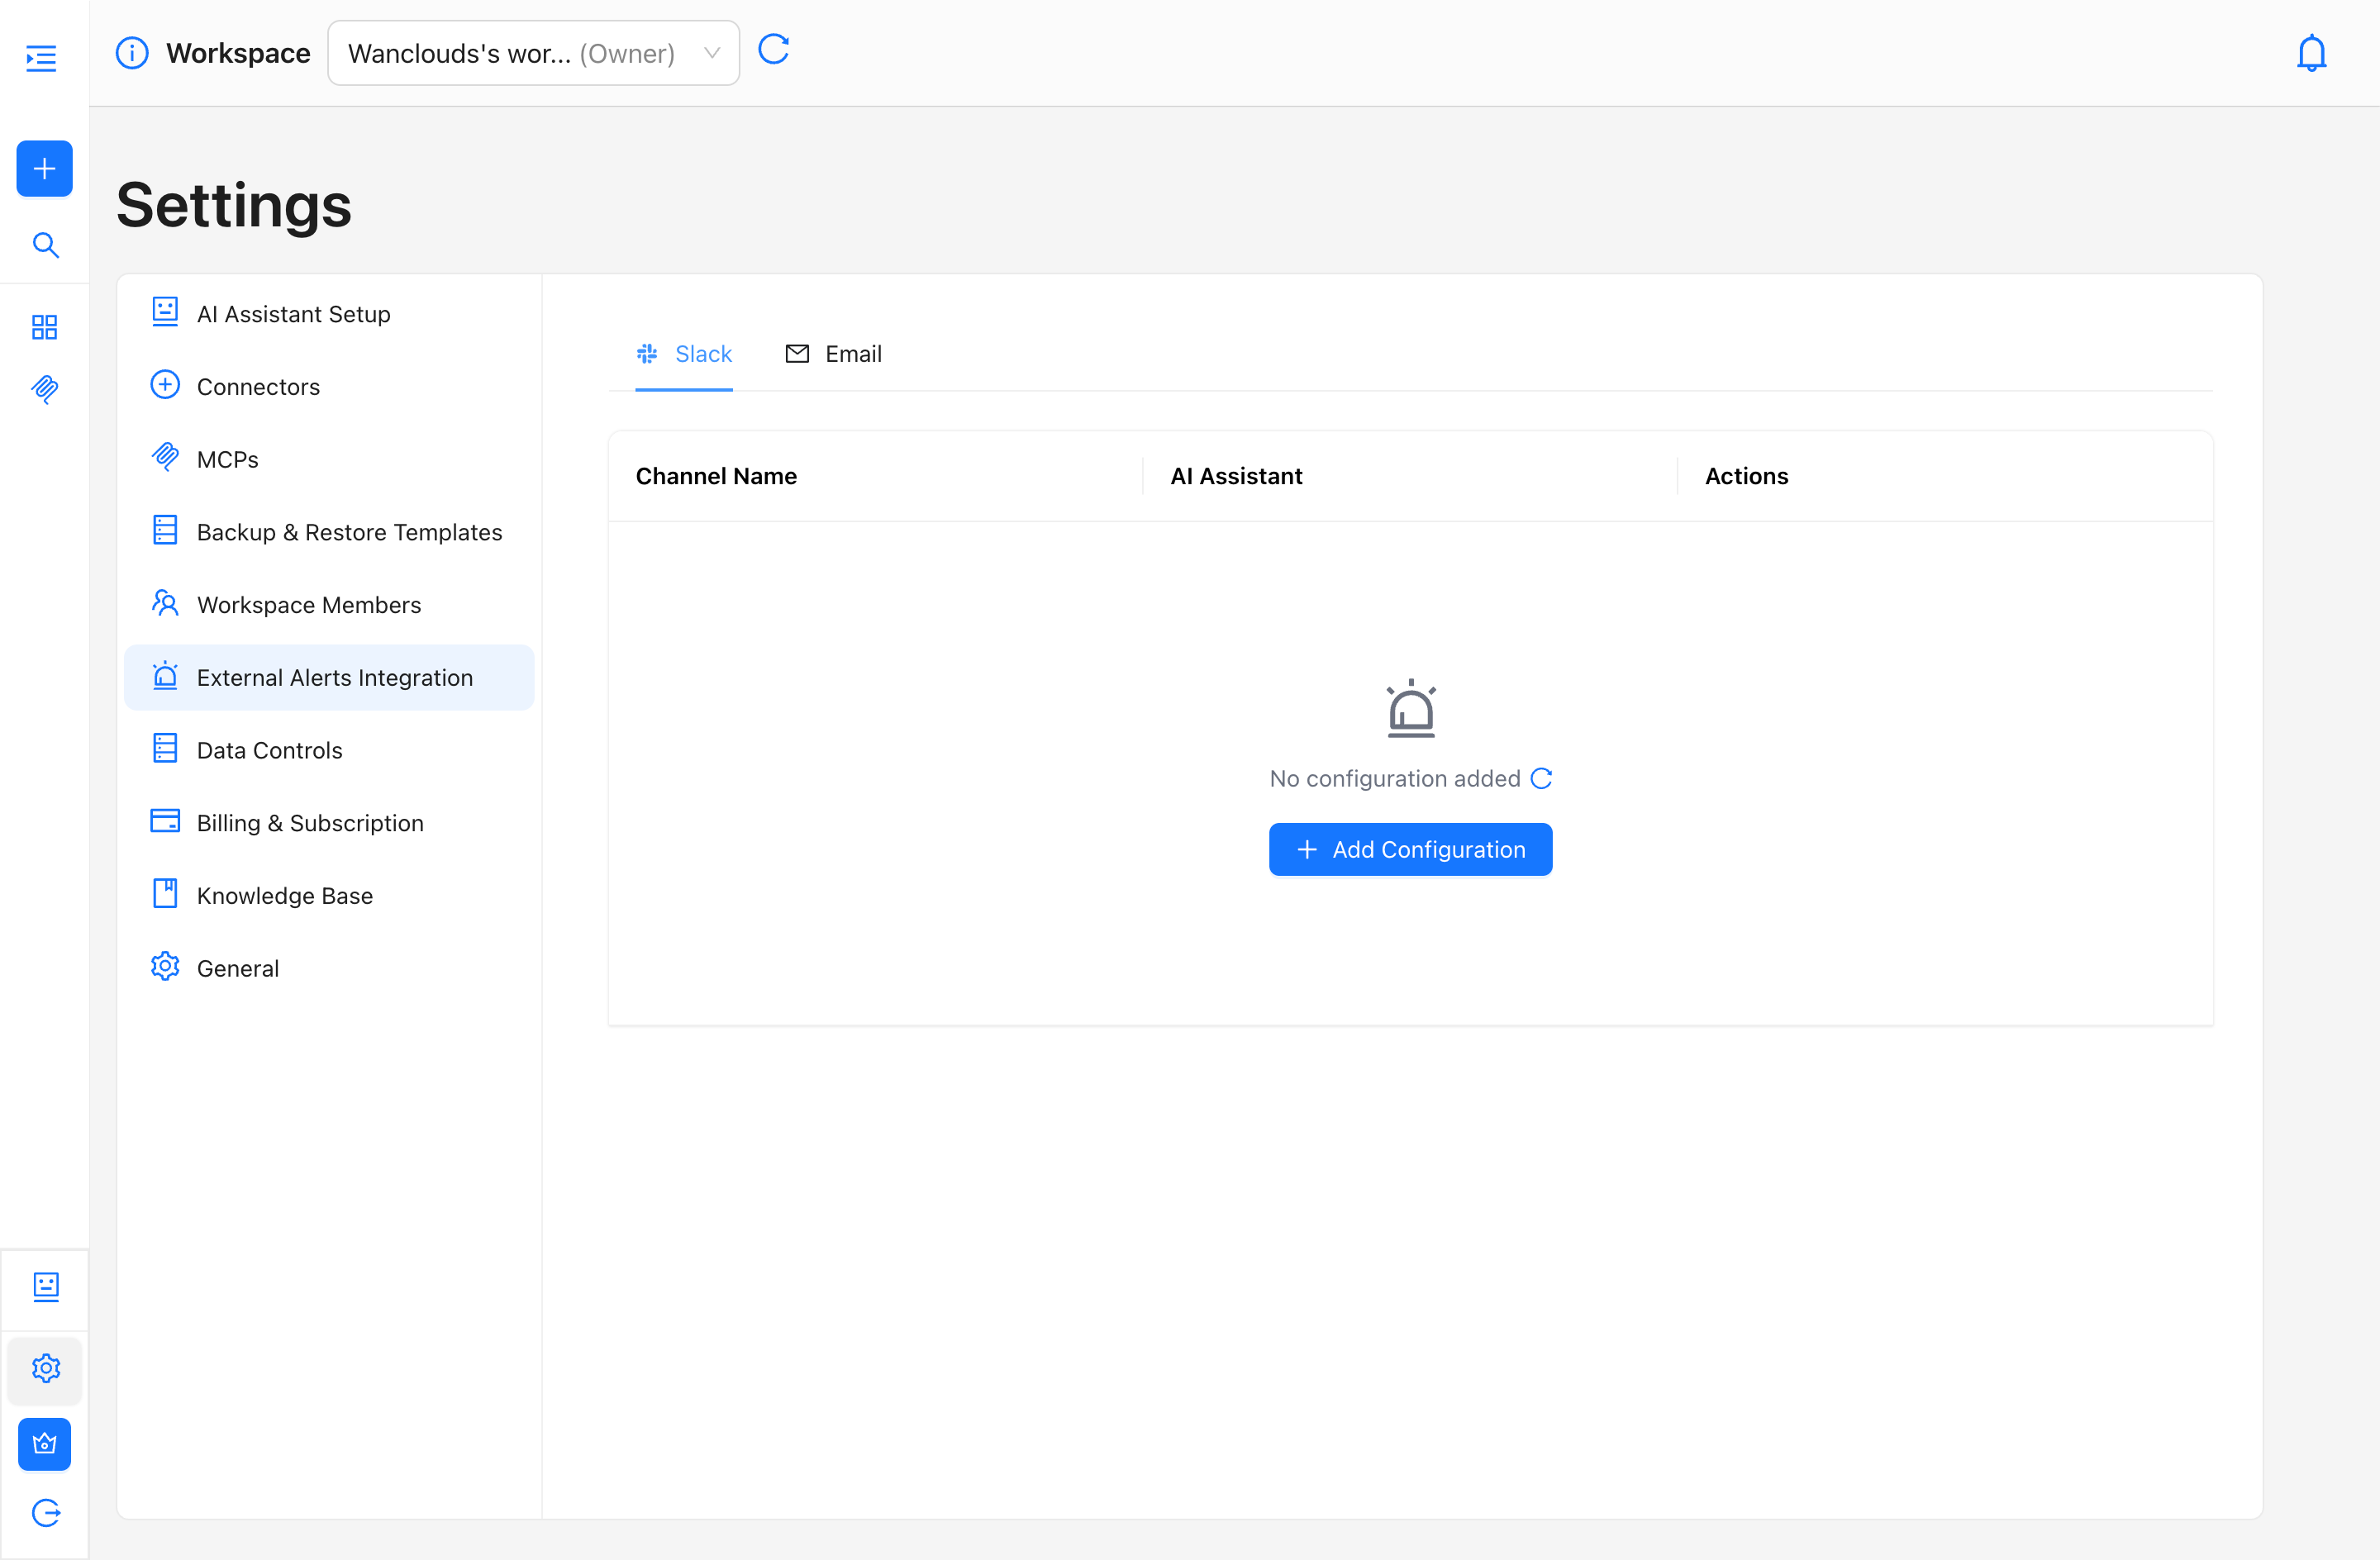
Slack Alerts
Slack alerts deliver real-time notifications from your AI assistant directly to a Slack channel.
Adding a Slack Configuration
- Navigate to Settings → Integrations in the sidebar.
- Select the Slack tab.
- Click Connect. You are redirected to Slack’s authorization page — click Allow to install the Wanclouds AI app in your Slack workspace.
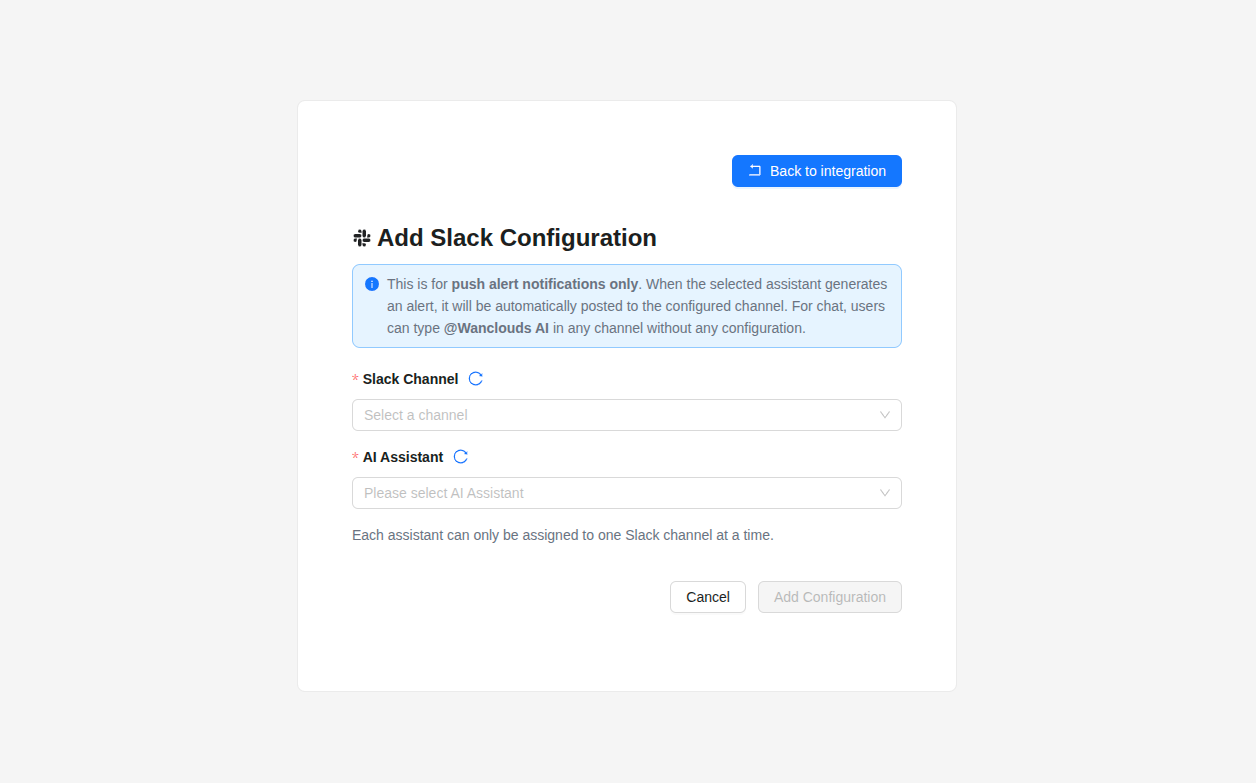
- After installation, you can configure which assistant’s alerts are sent to which Slack channel:
- Click + Add Configuration to open the Add Slack Alerts Integration page.
- Select the Slack channel where alerts should be posted.
- Select the AI Assistant whose alerts you want to send to that channel.
- Click Add Configuration.
Chatting with AI Assistants in Slack
Once your Slack workspace is connected, you can interact with your AI assistants directly in Slack — not only receive alerts.
In a Slack channel
Once connected, type @Wanclouds AI in any channel to ask questions and interact with an assistant. If multiple assistants are configured, run the /select-assistant command to open a modal and choose which assistant to interact with.
One-to-one in the Wanclouds AI app
Open the Wanclouds AI app in Slack (from Apps in the sidebar) to chat privately with an assistant in a direct, one-to-one conversation.
Use @Wanclouds AI in channels for team-visible conversations.
Use /select-assistant when you need to switch assistants.
Open the Wanclouds AI app for private one-to-one chat.
Email Alerts
Email alerts send notifications and alerts from your AI assistant to one or more email addresses.
Adding an Email Configuration
- Navigate to Settings → Integrations in the sidebar.
- Select the Email tab.
- Click + Add Configuration.
- On the Add Email Alerts Integration page, select the AI Assistant you want to link from the dropdown.
- Under Email(s), enter an email address in the input field and click + Add.
- Repeat to add additional recipients.
- Click Add Configuration once all recipients have been added.
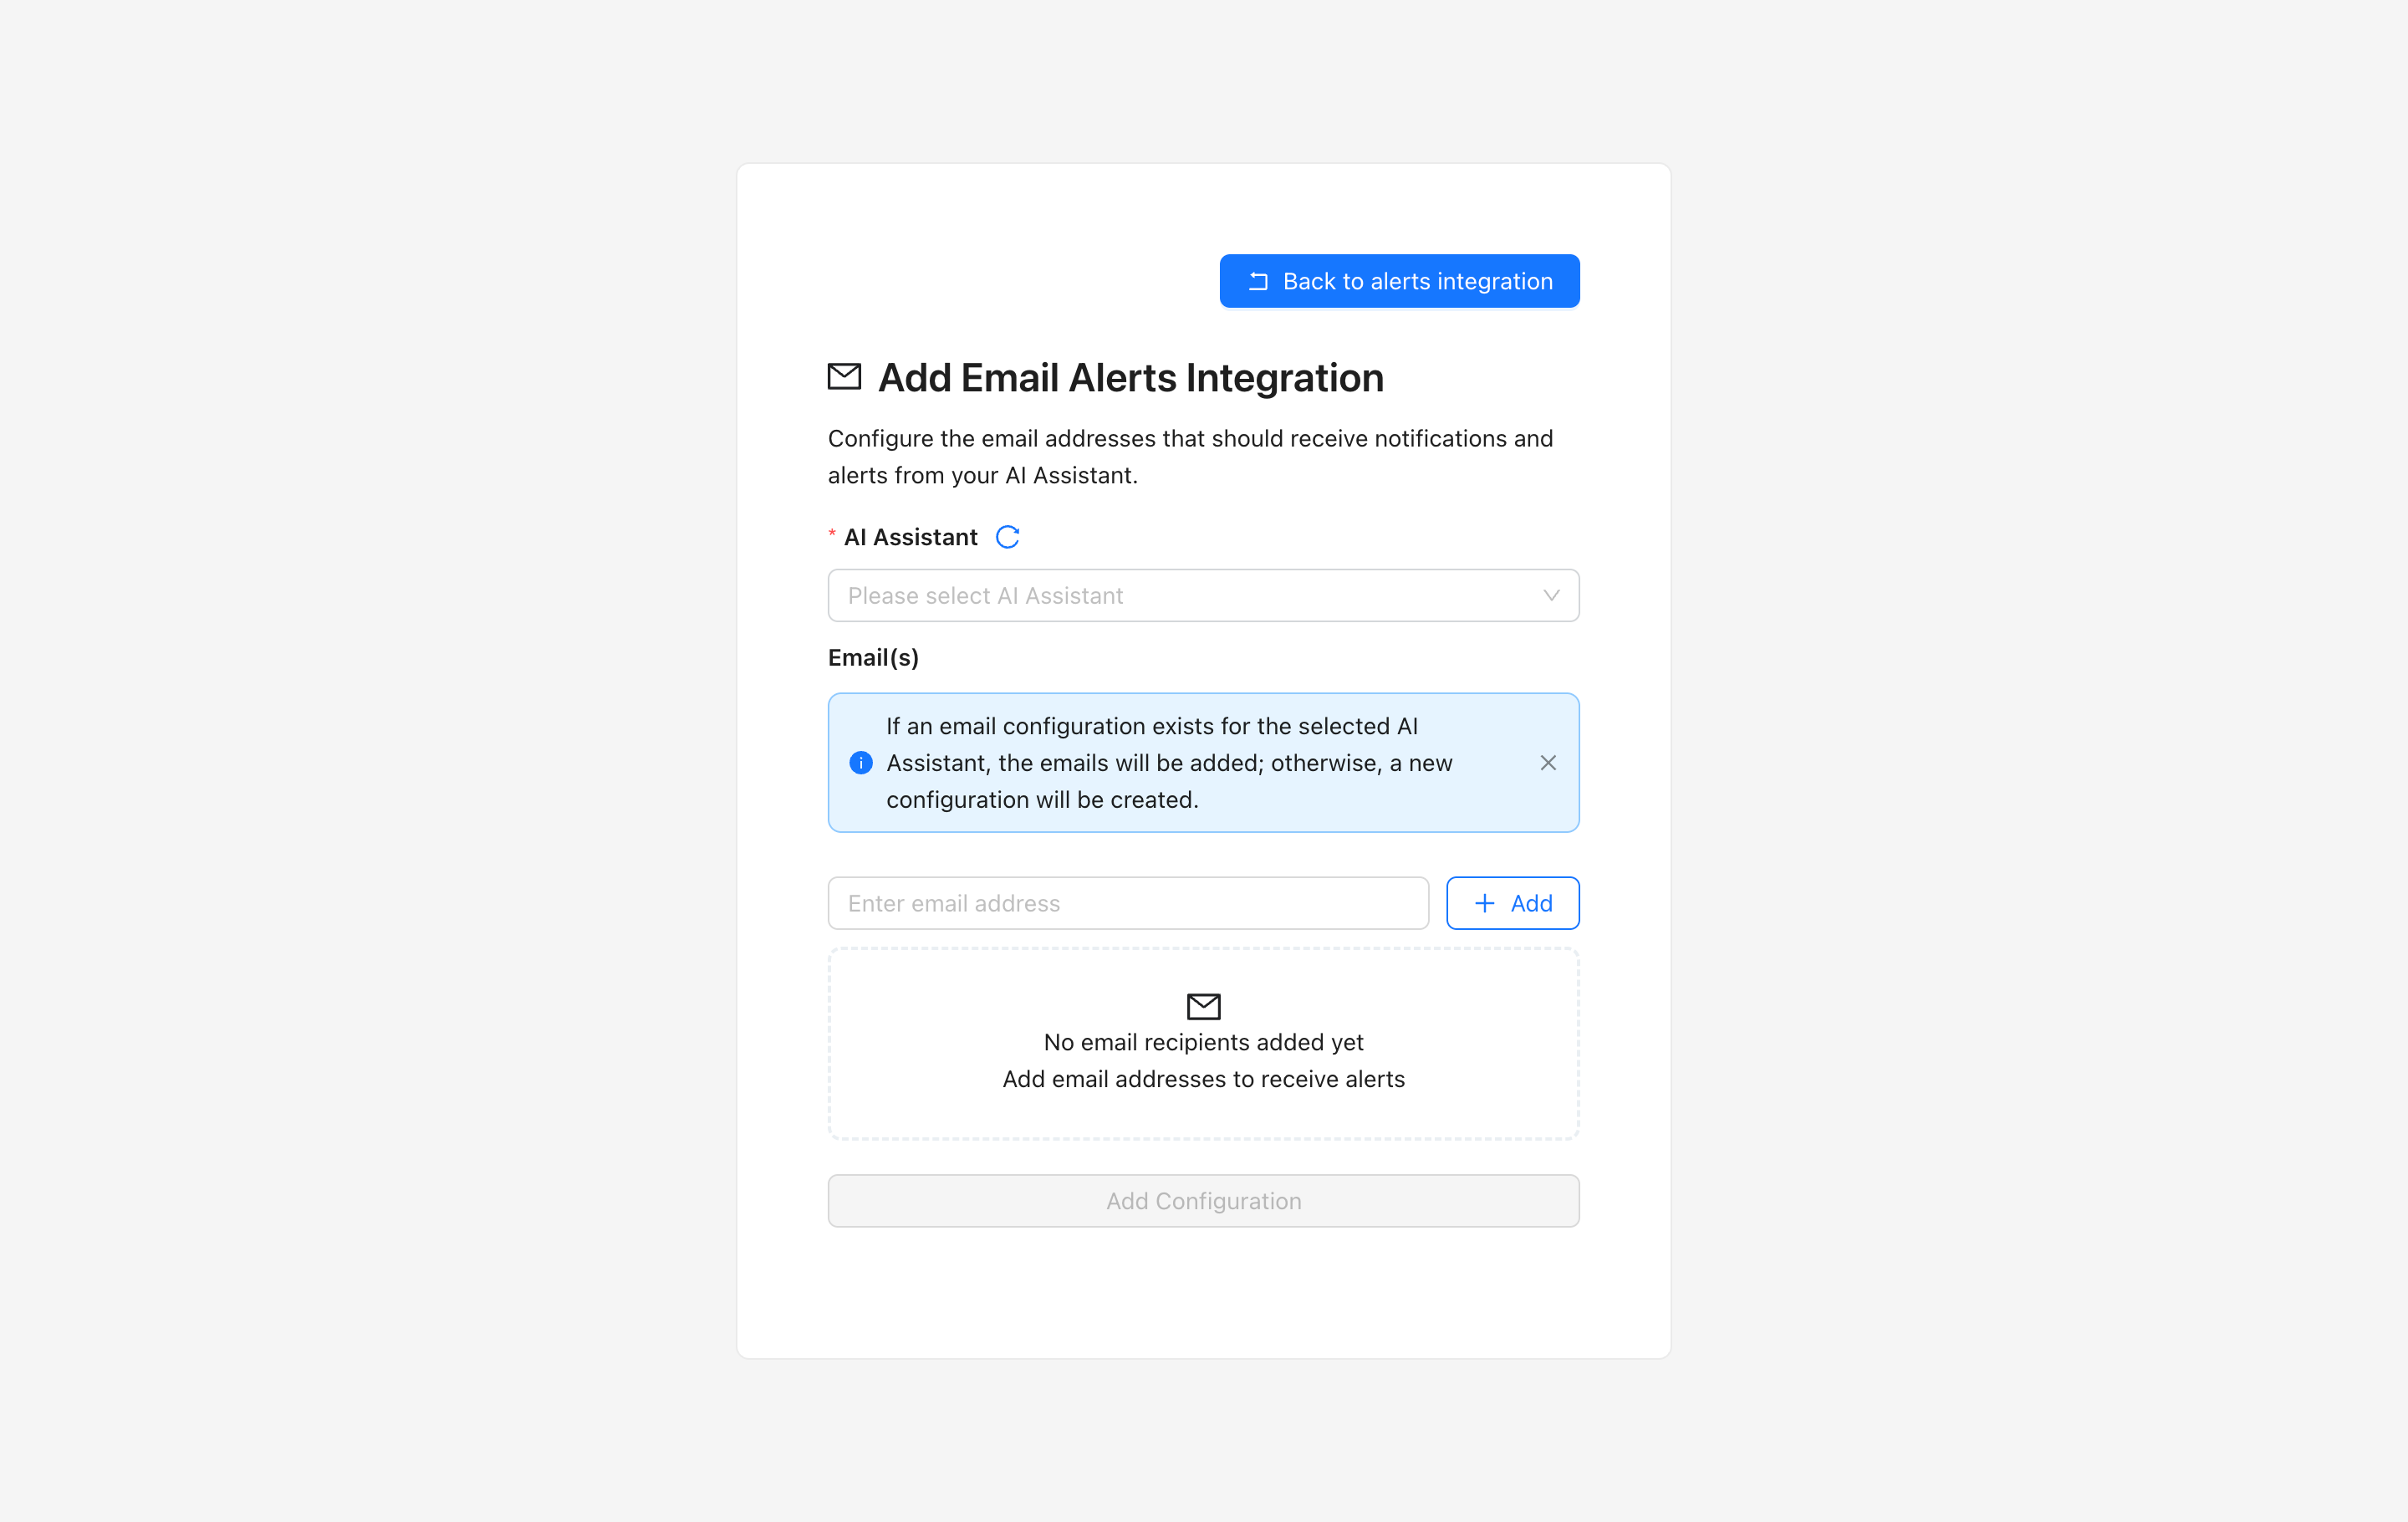
If an email configuration for a specific AI Assistant already exists, you can edit the configuration to add new emails to it. Otherwise, a new configuration will have to be created.
PAM Integration
Privilege Access Management (PAM) lets you authenticate to devices using credentials stored in your PAM provider instead of entering passwords or SSH keys directly. The platform retrieves managed account credentials from your PAM system at connection time.
Supported PAM provider:
- BeyondTrust
Prerequisites
Before you add a PAM connection, make sure you have:
- A BeyondTrust instance that your environment can reach (PAM URL).
- An API Access Policy registration and an application user in BeyondTrust, with a Client ID and Client Secret.
- The application user assigned to a group with permission to access the managed systems and accounts you will use.
To obtain these values, see Get BeyondTrust PAM credentials.
Adding a PAM Connection
- Navigate to Settings → Integrations in the sidebar.
- Select the Privilege Access Management (PAM) tab.
- Click + Add PAM Connection.
- Fill in the connection details:
- Connection name – A label for this connection (e.g.
BeyondTrust-Prod). - Provider Type – Select BeyondTrust.
- PAM URL – The base URL of your BeyondTrust instance (e.g.
https://pam.example.com). - Client ID – From the BeyondTrust application user.
- Client Secret – From the BeyondTrust application user (shown when the user is created; store it securely).
- Connection name – A label for this connection (e.g.
- Click Create.
You can also add a PAM connection while creating a device: select Privilege Access Management (PAM) as the authentication type and click Add PAM next to the PAM Connections field.
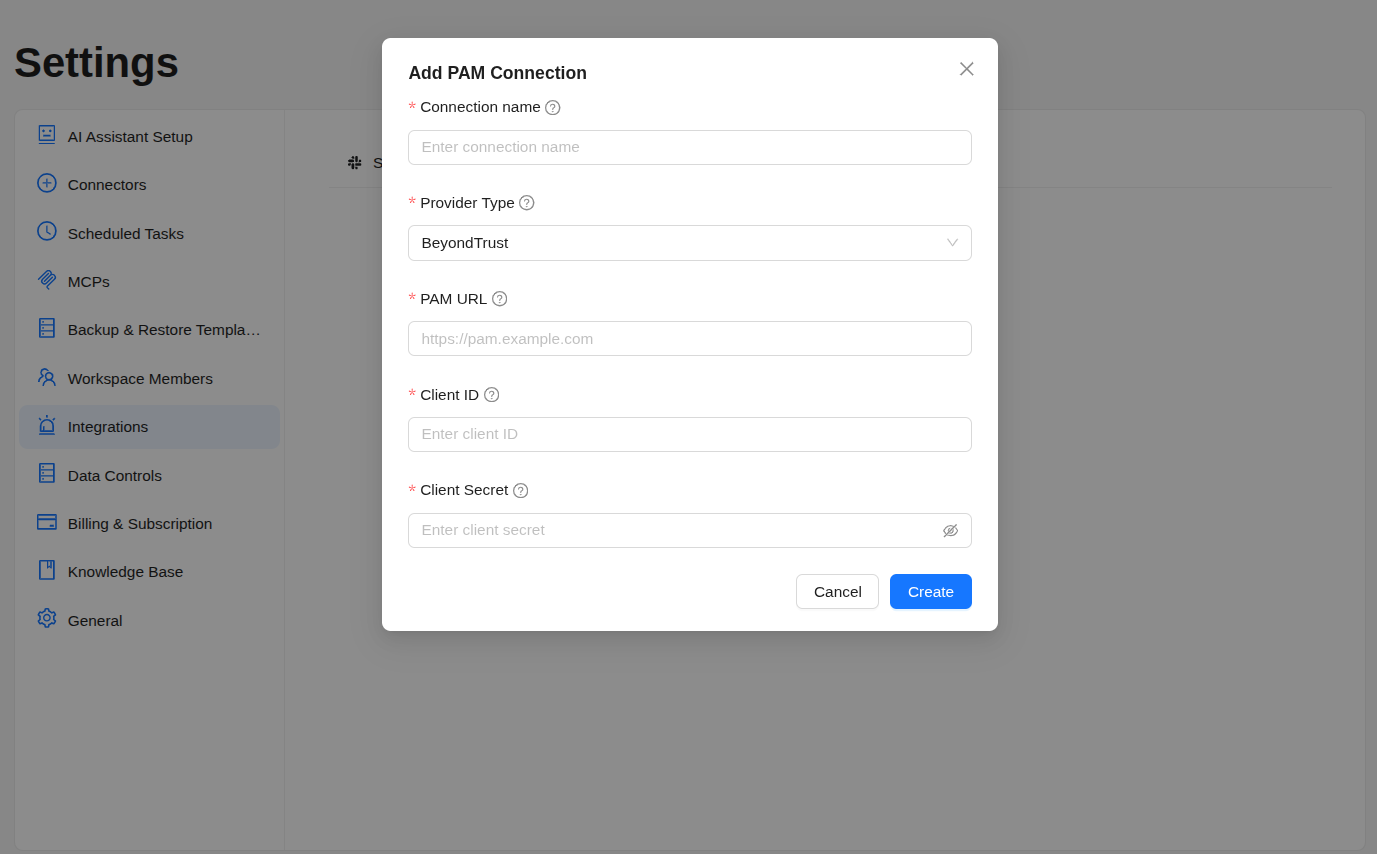
The connection is then available when you add a device with Privilege Access Management (PAM) authentication.
If you do not manage BeyondTrust yourself, ask your PAM administrator for the PAM URL, Client ID, and Client Secret.
Get BeyondTrust PAM credentials
Use this walkthrough in the BeyondInsight / Password Safe console to prepare API access and collect the values required for adding PAM Connection.
Menu names can vary slightly between Password Safe Cloud and Password Safe On-Premises. Prefer BeyondTrust’s official docs linked in each step if your console labels differ.
BeyondTrust Cloud vs On-Premises
BeyondTrust Password Safe is available in two deployment models. The setup steps below are the same in principle; only hosting and how you receive the URL differ.
| Aspect | Password Safe Cloud | Password Safe On-Premises |
|---|---|---|
| Hosting | Hosted by BeyondTrust | Hosted in your data center or private cloud |
| URL source | BeyondTrust (usually in the welcome email) | Your IT / PAM team |
| Console URL | https://<your-site>.beyondtrustcloud.com/login | Your appliance or site URL (e.g. https://passwordsafe.yourcompany.com) |
| PAM URL | Base site URL without /login (e.g. https://<your-site>.beyondtrustcloud.com) | Base URL of your BeyondInsight / Password Safe instance |
BeyondInsight is the management console (users, groups, API registrations, permissions). Password Safe is the credential vault (managed systems and managed accounts). Together they are BeyondInsight and Password Safe — that combined instance is what PAM URL points to.
Official product docs (pick the guide that matches your deployment):
- Cloud API registration: Password Safe Cloud — API registration
- On-premises API registration: Password Safe On-Premises — API registration
1. Confirm your BeyondTrust instance (PAM URL)
- Get the BeyondInsight / Password Safe site URL from your PAM administrator (or from the BeyondTrust welcome email for Cloud).
- Sign in to the console to confirm you can access it.
- Record the base URL as your PAM URL (for example
https://pam.example.comorhttps://<your-site>.beyondtrustcloud.com).
2. Create an API Access Policy and authentication rules
The platform authenticates with OAuth using an application user. That user must be tied to an API Access Policy registration.
- Sign in to the BeyondInsight / Password Safe console.
- Go to Configuration → General → API Registrations.
- Click Create API Registration.
- Create an API Access Policy (OAuth) registration for application users.
- Set Access Token Duration as required by your security policy.
- Click Add Authentication Rule and add at least one rule (typically an IP / CIDR for the addresses that will call the API).
- Click Create Rule, then Create Registration.
More detail: API registration (On-Premises) · API registration (Cloud)
3. Create a Privileged Access Management access policy and schedule
An access policy controls when passwords or sessions can be requested. You need one to assign the Requestor role later.
- Go to Configuration → Privileged Access Management Policies → Access Policies.
- Click Create New Access Policy, enter a name, and create it.
- On Basic Details, add a description (optional).
- Open the Schedule tab → Create Schedule.
- Set recurrence, time window, and access types you need (for API password retrieval, include View Password; enable Auto Approve if your policy allows unattended API access).
- Click Create Schedule and activate the policy if prompted.
More detail: Access policies (On-Premises) · Access policies (Cloud)
4. Create an application user and copy Client ID / Client Secret
- Go to Configuration → Role Based Access → User Management.
- Open the Users tab → Create New User → Add an Application User.
- Enter a username (for example
wanclouds-ai-pam). - Under API Access Policy, select the policy from step 2.
- Copy and store the Client ID and Client Secret immediately (the secret may only be shown once).
- Click Create User.
Treat the Client Secret like a password. If it is lost, recycle it in BeyondTrust and update your PAM connection.
More detail: Add an application user
5. Create a group and assign the application user
Permissions in BeyondInsight are granted through groups, not directly on the application user.
- In User Management, open the Groups tab.
- Click + Create New Group → enter a name and description → Create Group.
- Under Group Details → Users, show Users not assigned, select your application user, and click Assign User.
More detail: Create a group and assign roles
6. Group Details — features, API registration, and Smart Groups
Open Group Details for that group:
- Features – Select the Password Safe / BeyondInsight features your integration needs and assign control, i.e. Full Control.
- API Registrations – Select the API Access Policy registration from step 2 so this group can use the API.
- Smart Groups – Select the Managed Account (and/or Managed System) Smart Groups that contain the accounts you want the platform to use.
- Click Assign Permissions (Read Only or Full Control as appropriate).
- For each relevant Managed Account Smart Group, open Edit Password Safe Roles.
- Enable Requestor and select the access policy from step 3.
- Optionally enable Approver if your workflow requires it.
- Click Save Roles.
More detail: Role-based access · Configure group with API access
7. Enable API access on Managed Accounts
Managed accounts are invisible to the API until API Enabled is turned on.
- From the left sidebar, open Managed Accounts.
- For each account the platform should use: Edit Account → expand Account Settings → turn on API Enabled → Update Account.
For many accounts at once, use a Managed Account Smart Rule / Smart Group action to set API Enabled.
More detail: Enable API setting for managed account
Values to use in the platform
| Value | Where it comes from |
|---|---|
| PAM URL | BeyondTrust instance base URL (step 1) |
| Client ID | Application user (step 4) |
| Client Secret | Application user (step 4) |
After you have these values, return to Adding a PAM Connection and create the connection.
Managing Configurations
Existing configurations are listed in the table on the Integrations page. From there you can edit or delete any configuration using the options in the Actions column.
To return to the main Integrations page from any setup screen, click Back to integration in the top-right corner.